The ‘Accord View’ is a view, were the items such as labels or thumbnails are listed in a vertically stacked mode. Each item can be “expanded” or “stretched” to reveal the content associated with that item. There can be exactly one item expanded at a time, depending on the configuration.When a button is selected any other active panes cease to be active and are hidden.
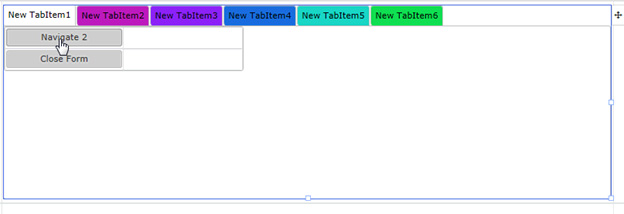
Step 1: Create a form as shown below, by dragging the ‘Tab Control’.
Figure 6
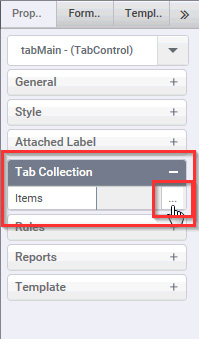
Step 2: Here, insert the tabs into the tab control, from the properties (Tab Collection).
Figure 7
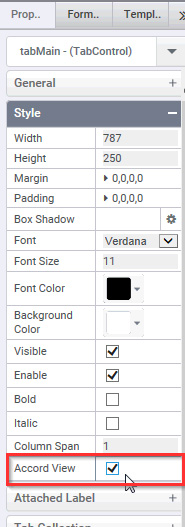
Step 3: In the Properties, click the check box of the property called ‘Accord View’.
Figure 8
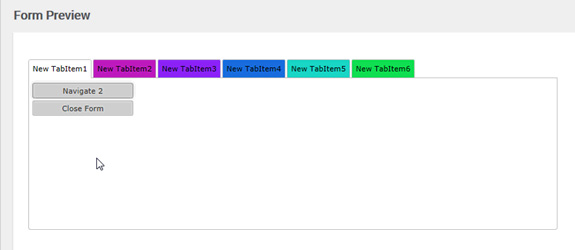
Step 4: Check the Form Preview, and analyze the change.
Figure 9: Form Preview before clicking the ‘Accord View’
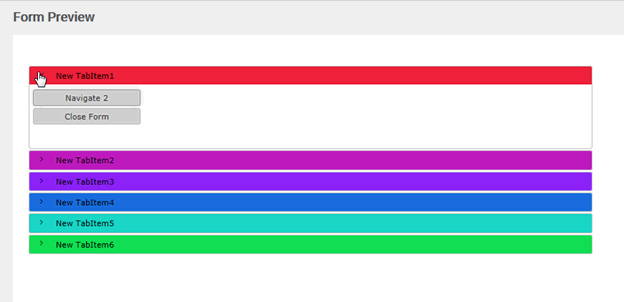
Figure 10: Form Preview after clicking the ‘Accord View’
There are two methods for getting date details (day,month,year,time) from the date time field.
1) Using SubString and StringReplace function
Step 1 : Create a form with DateTimePicker control, 4 Text-boxes ,1 hidden control ,1 button as shown in the figure 1.
Figure 1
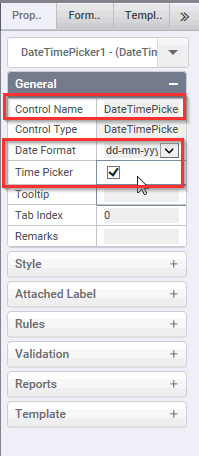
Step 2 : Click on the DateTimePicker control to get its properties . Select the Date Format for example here we selected ‘dd-mm-yyyy’ format. Also check the Time picker check-box to show the time.
Figure 2
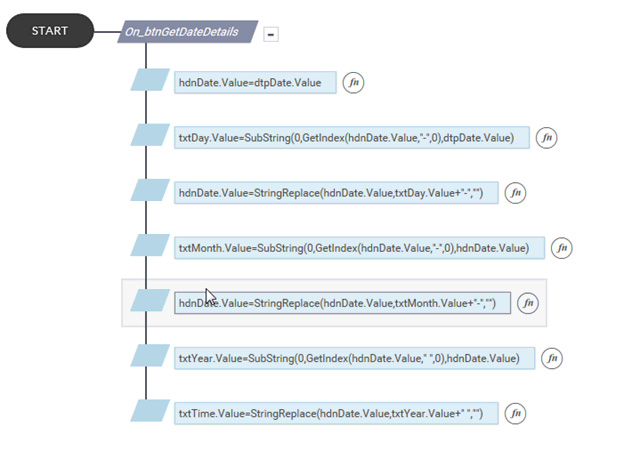
Step 3 : Write the following rule on ‘Get Date Details’ button as the trigger.
Figure 3
Rules :
hdnDate.Value=dtpDate.Value
The value in DateTimePicker control is assigned to the hidden control ‘hdnDate’ . for example hdnDate will get a value like ‘ 15-03-2016 12:00 AM’.
By using ‘SubString’ function the day (i.e string before hyphen) is taken and stored in ‘txtDay’ control. By using ‘GetIndex’ function we can get the index of hyphen in the date.
After getting value of day in ‘txtDay’ ,the value of day must be removed from ‘hdnDate’ control by using ‘StringReplace’ function to replace the day with space.
txtMonth.Value=SubString(0,GetIndex(hdnDate.Value,”-“,0),hdnDate.Value) We can get the Month from this rule.
Step 1 : Create a form with DateTimePicker control, 4 Text-boxes ,1 hidden control ,1 button as shown in the figure 1.
Figure 4
Step 2 : Click on the DateTimePicker control to get its properties . Select the Date Format for example here we selected ‘dd-mm-yyyy’ format. Also check the Time picker check-box to show the time.
Figure 5
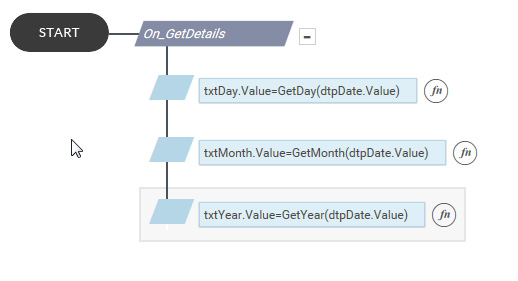
Step 3 : Write the following rule on ‘Get Date Details’ button as the trigger.
Figure 6
Rules :
txtDay.Value=GetDay(dtpDate.Value)
We can get the day in the ‘txtDay’ control.
txtMonth.Value=GetMonth(dtpDate.Value)
We can get the month in the ‘txtMonth’ control.
txtYear.Value=GetYear(dtpDate.Value)
We can get the year in the ‘txtYear’ control.
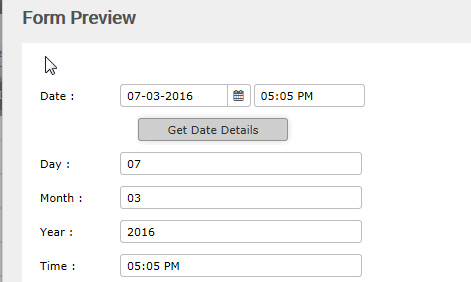
Preview :
Figure 4
Enter the date and time and then click on ‘Get Date Details’ button. Day, Month,Year, Time will be shown as result in the respective text-boxes as shown in the Figure 4 .
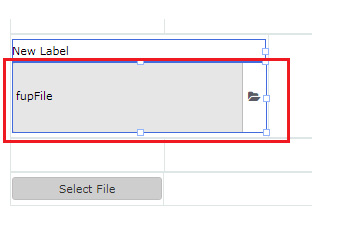
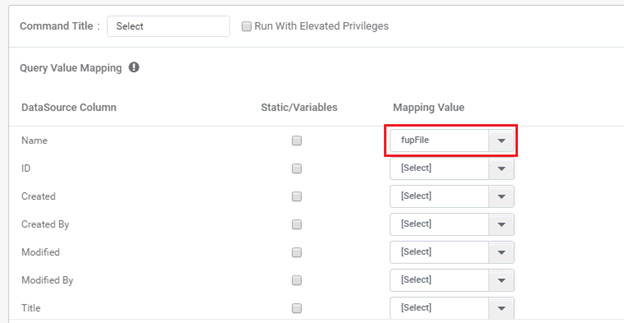
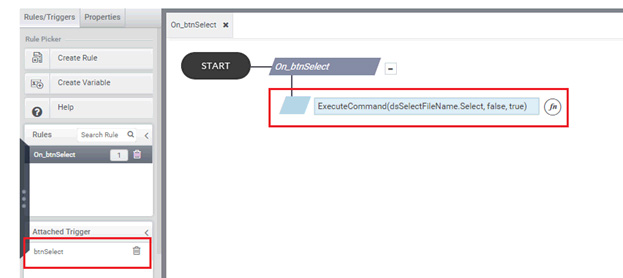
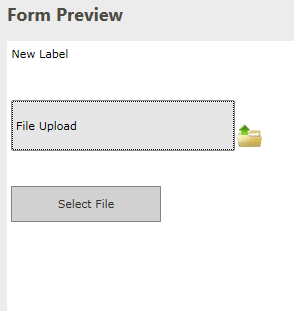
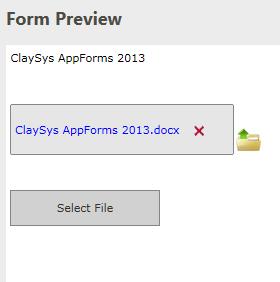
In the form include a FileUpload control and Select the particular files to that FileUpload control while setting up the datasource in the trigger of a button. This is shown below.
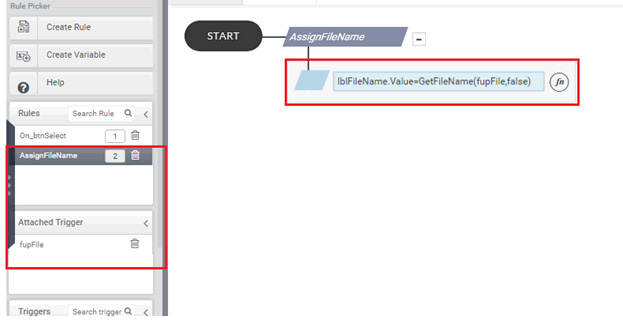
While doing this we are getting that particular file inside the FileUpload control. Now on the trigger of the FileUpload control write a rule as shown below.
Here, on the trigger of the FileUpload control we are getting the file name and setting it to the Label control.
GetFileName have the following syntax,
Where the second argument Has Extension can be set to True when the user needs to display the extension of a particular file.
To pass a value inside any control to an External you must first configure the forms accordingly. This is a sample demonstration to achieve this scenario.
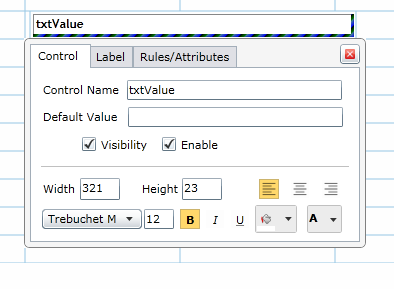
Create a form, which you need to configure it as an External Form. Here is an example. Drag and drop a text box control as shown below.
Save and check in the form.
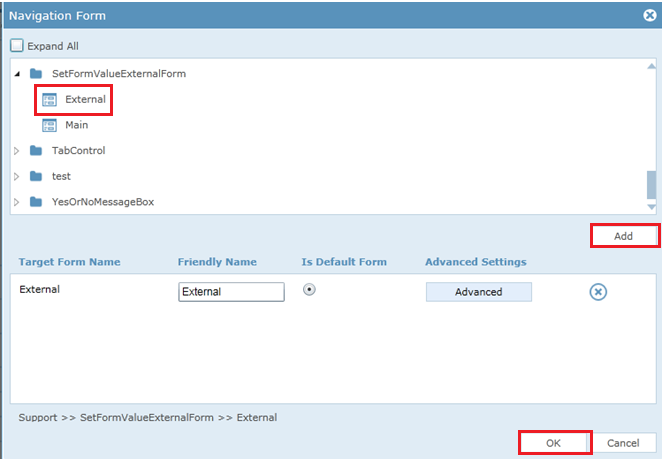
Create another form, drag and drop an External Form control, configure the external form so that it is navigated to the form we created earlier. This is illustrated below.
Select the form and click the Add button and click ok.
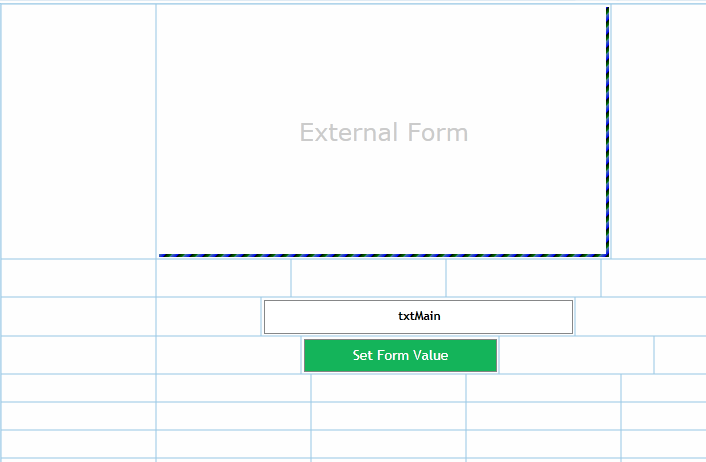
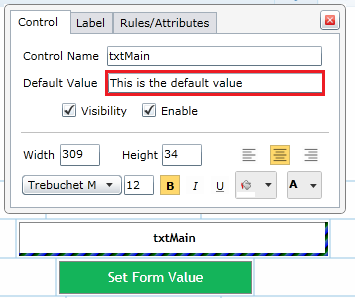
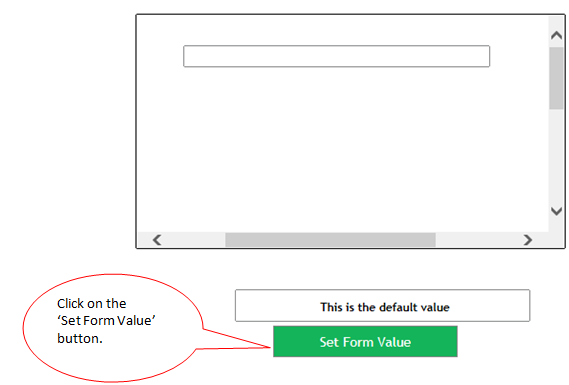
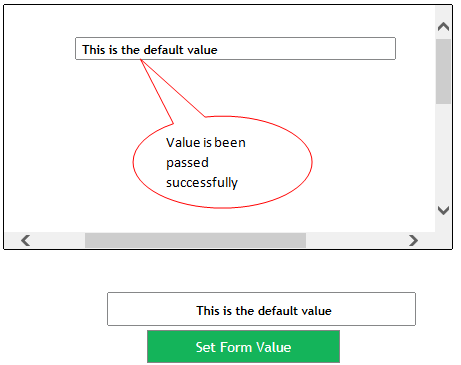
Drag and drop a text box and a button control. Add some default value in the text box. On the trigger of the button this default value should be passed to the text box inside the External Form. This is illustrated below.
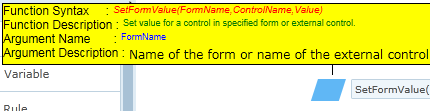
For passing this value we have a function called “SetFormValue”. The syntax is shown below.
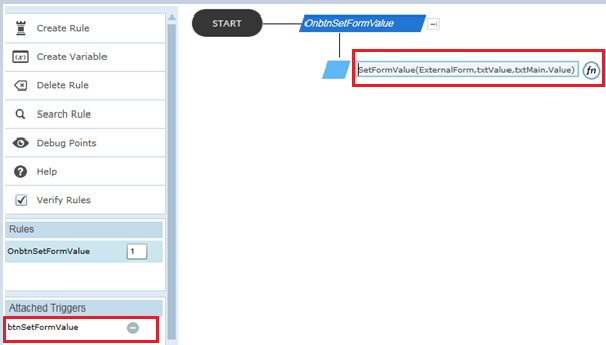
The complete rule is,
Note: SetFormValue is only applicable in web part; add this form to the web part to see the result.