This example is using the User Profile Web service in SharePoint.
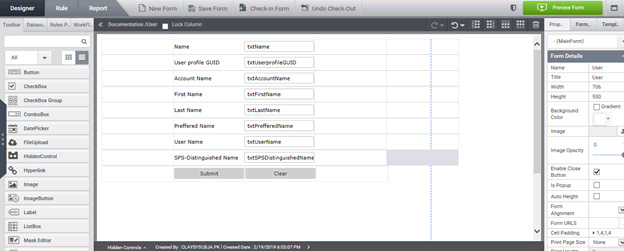
1. Add the necessary controls into the form as shown below.
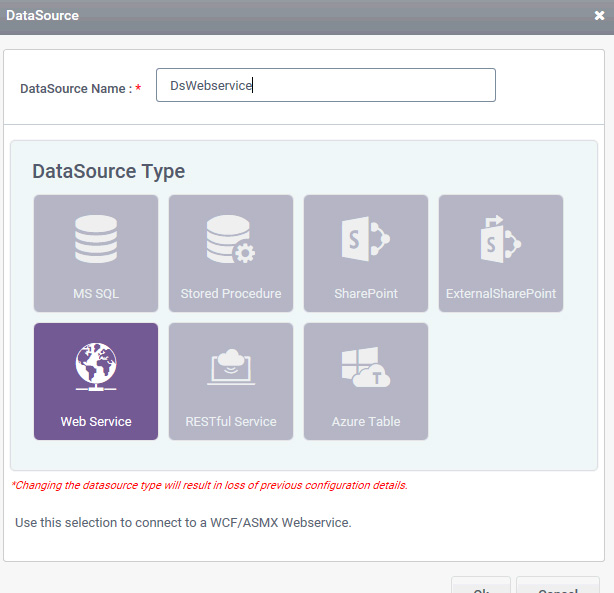
2. Add a FormDataSource with WebService Configuration.
3. Select the User profile web service data source
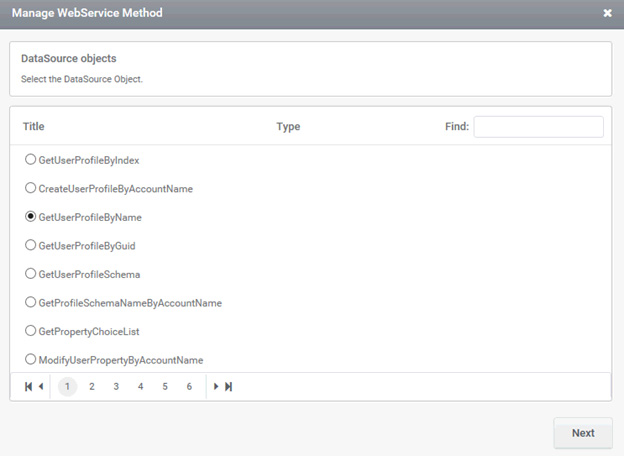
4. Select the web method “GetUserProfileByName” in the wizard which will be opened after clicking Next and then Add Button.
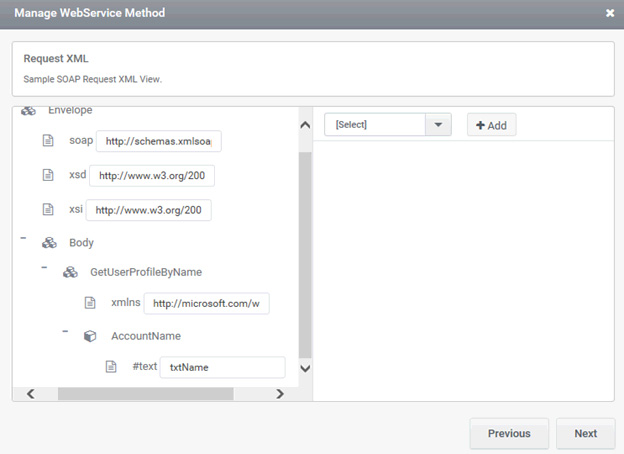
5. Enter the Input Control name into the Request XML.
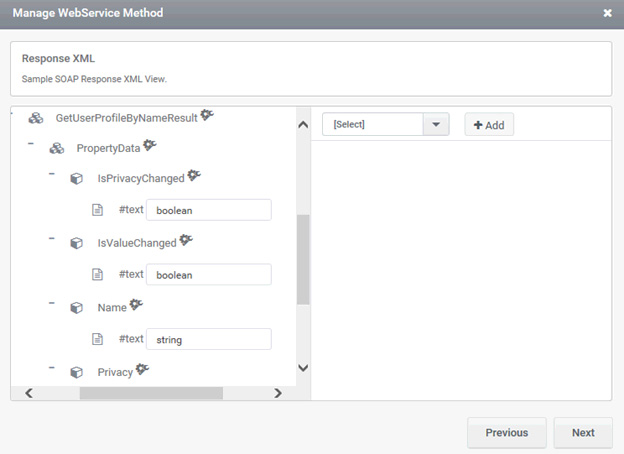
6. In the Response XML Window, the value of the Node “Value” will be filled accordingly to the criteria (Criteria will be added in the next wizard.)
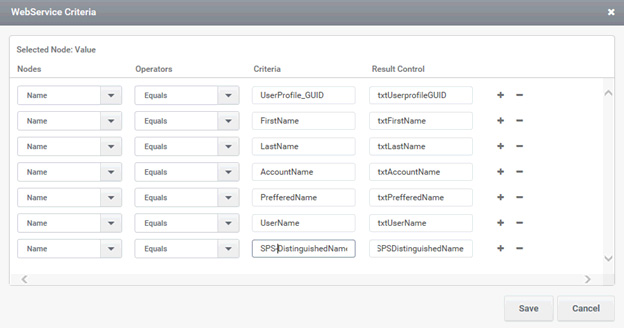
7. Click on the circle button next to the node “Value” which will open up the criteria window. Map the Criteria as shown below, Value of the node “Value” will be loaded to the result controls by matching the criteria.
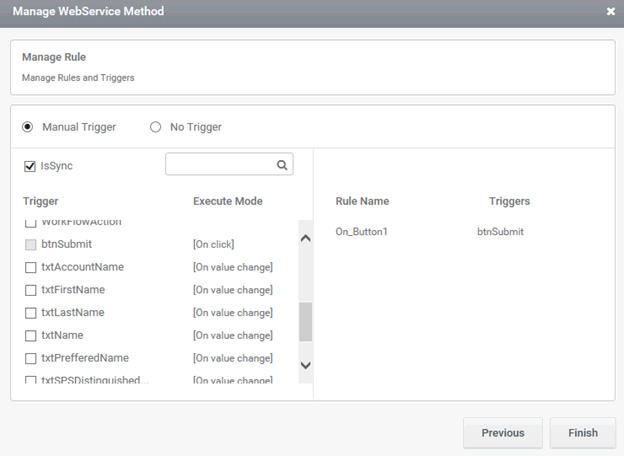
8. After finishing the Select command Configuration, add the trigger.
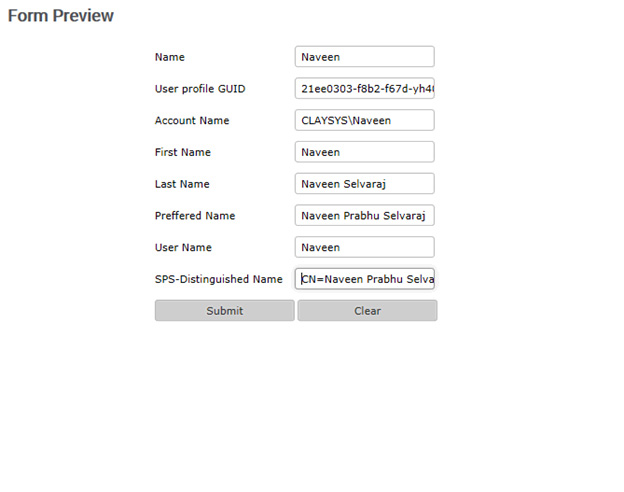
9. As the first TextBox is Input Field, the Name is given in the first field and click on submit to get all the controls to be filled based on the criteria.
In ClaySys AppForms a user can pass value from a form to an External Form inside the form. For that we use the SetFormValue() function. Here we are demonstrating how to achieve this functionality.
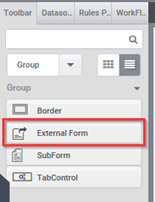
Create a form, drag and drop an External Form control from the Group tab under the Toolbox in the left pane of the AppForms.
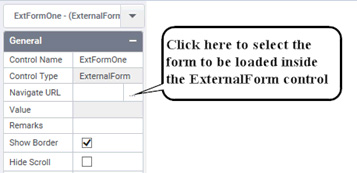
Now load a form into the external form using the Navigate URL property in the property window of the external form control.
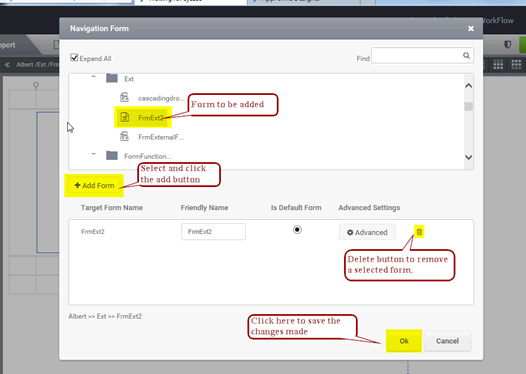
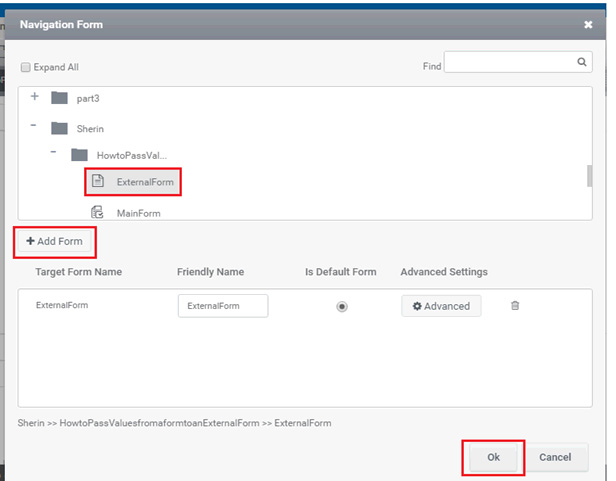
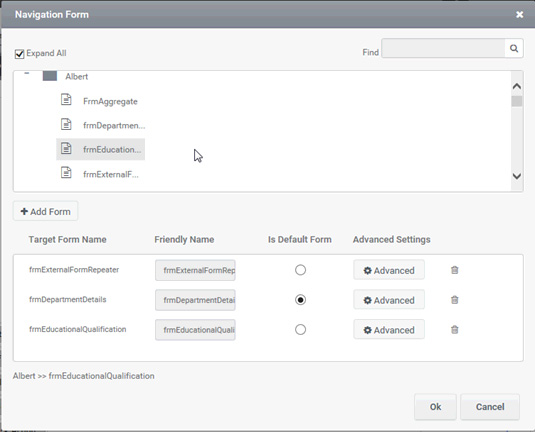
A pop up window will appear prompting the user to select a form into the ExternalForm. Select the form and click the Add and then the OK button to finish the selection procedure.
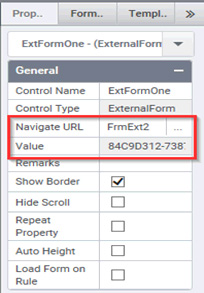
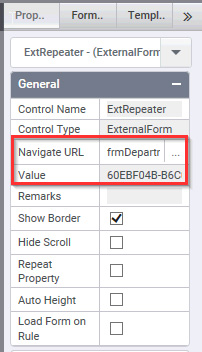
Now in the property window of the ExternalForm you can see the ID of the form is passed.
Now drag a drop a button control in the parent form. In the trigger of this button control, create a rule to set the value to the ExternalForm using the SetFormValue() function.
SetFormValue have 3 arguments.
1.The name of the form to which the value is been passing. But while dealing with ExternalForm control, you only need to pass the name of the ExternalForm control.
2.The Control name where the value is to be passed.
3.Finally the value to be passed. Either it can be a string or a value from a control.
The complete rule,
Note: SetFormValue() only works in WebPart, so add the form to the WebPart to view the output.
To pass a value inside any control to an External you must first configure the forms accordingly. This is a sample demonstration to achieve this scenario.
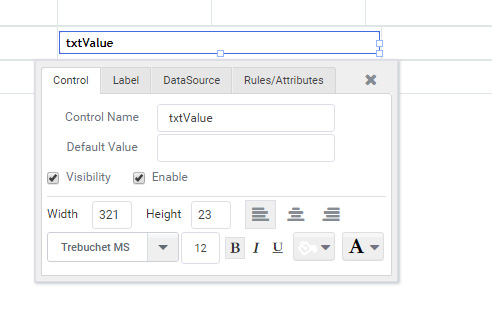
Create a form, which you need to configure it as an External Form. Here is an example. Drag and drop a text box control as shown below.
Save and check in the form.
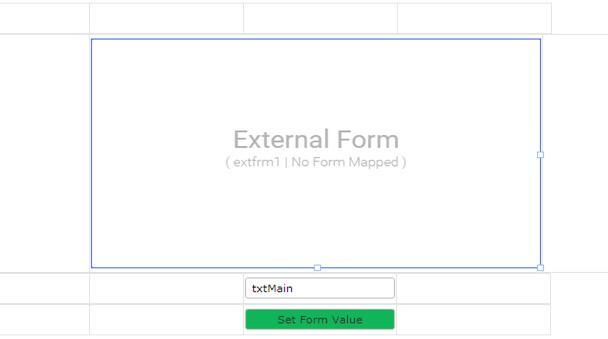
Create another form, drag and drop an External Form control, configure the external form so that it is navigated to the form we created earlier. This is illustrated below.
Select the form and click the Add button and click ok.
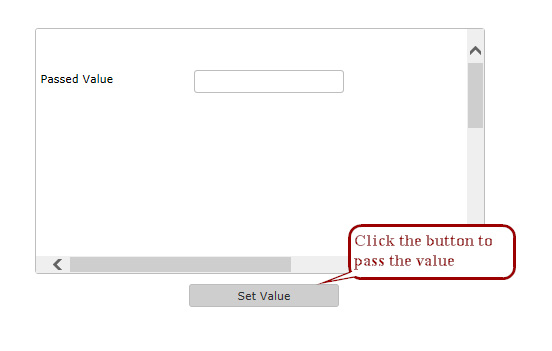
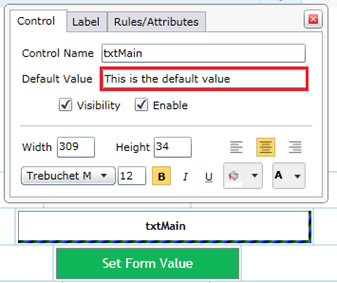
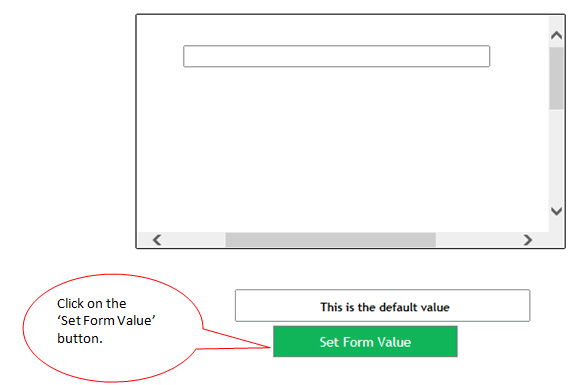
Drag and drop a text box and a button control. Add some default value in the text box. On the trigger of the button this default value should be passed to the text box inside the External Form. This is illustrated below.
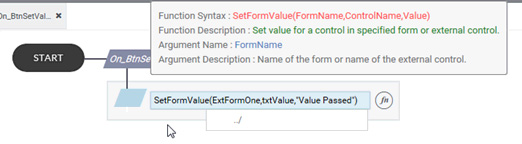
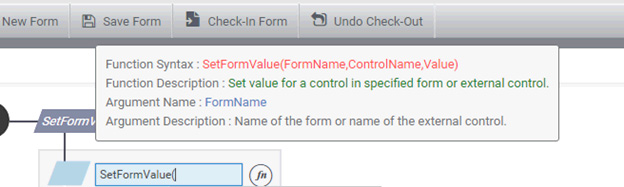
For passing this value we have a function called “SetFormValue”. The syntax is shown below.
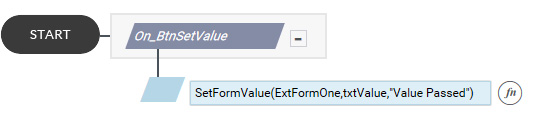
The complete rule is,
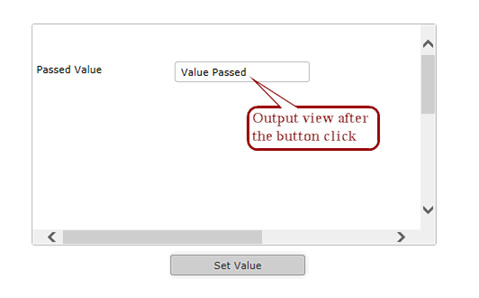
Note: SetFormValue is only applicable in web part; add this form to the web part to see the result.
A Theme is a quick and easy way to give a professional and modern look to a form or document. This property can be viewed in the AppForms too for the Border control.
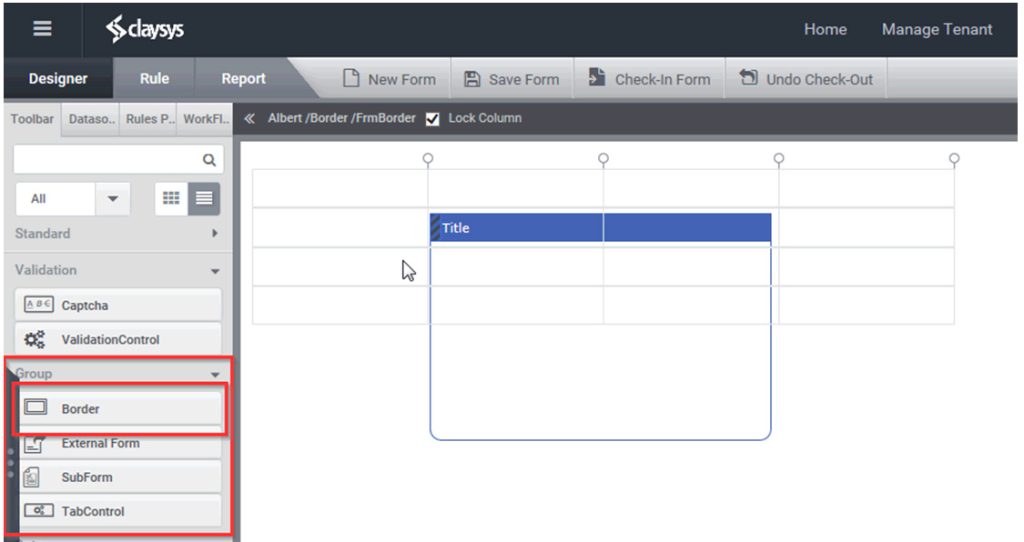
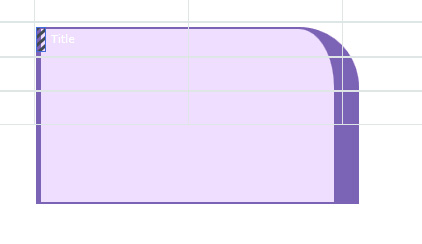
1.Create a form as shown below in-order to implement the property, ‘Theme’ for the Border control. In the ‘Designer’, drag the control, named ‘Border’ from the ‘Group’, in the ‘Toolbox’
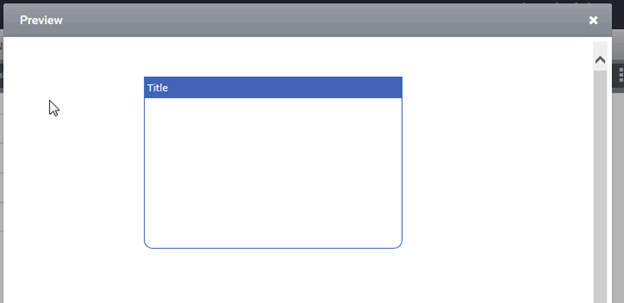
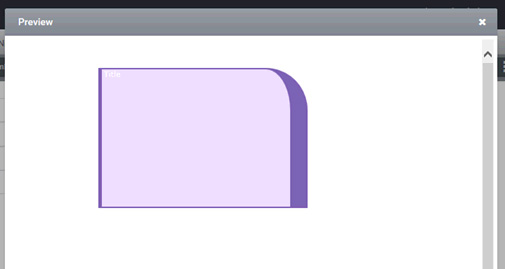
Figure 1: Designer Figure 2: Preview
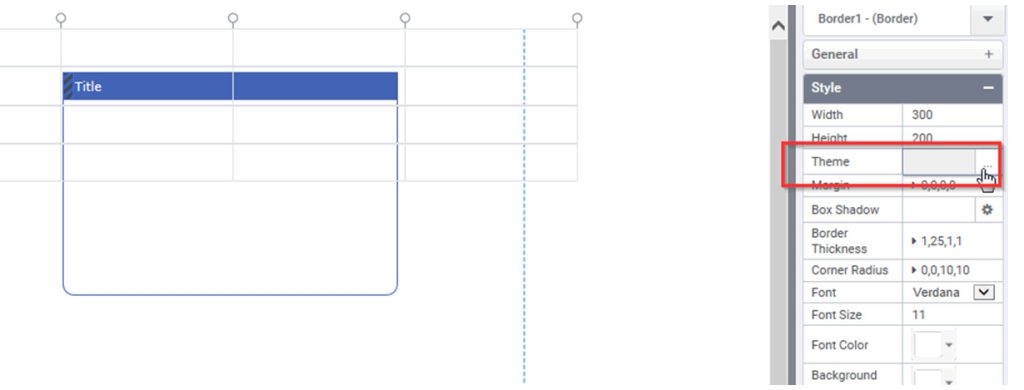
2.In the ‘Property’ section, select the property ‘Theme’ from ‘Style’ and Click on the button provided in the ‘Theme’.
Figure 3
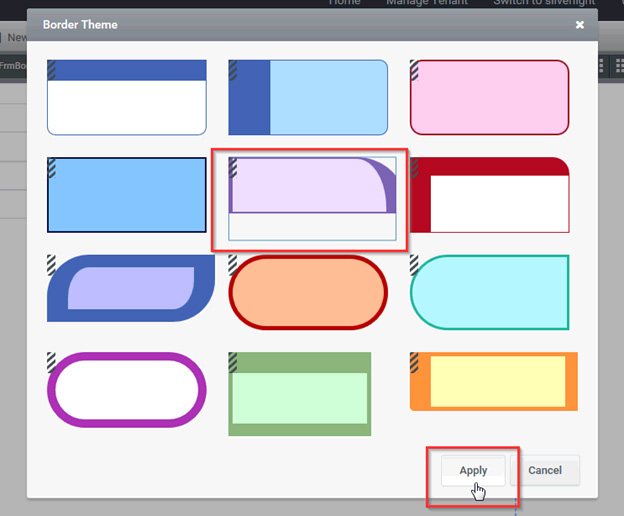
3.In the appeared window, named ‘Border Theme’, select a theme and click on the ‘Apply’ button.
Figure 4: Border Theme window
4. The selected theme will be shown in the border.
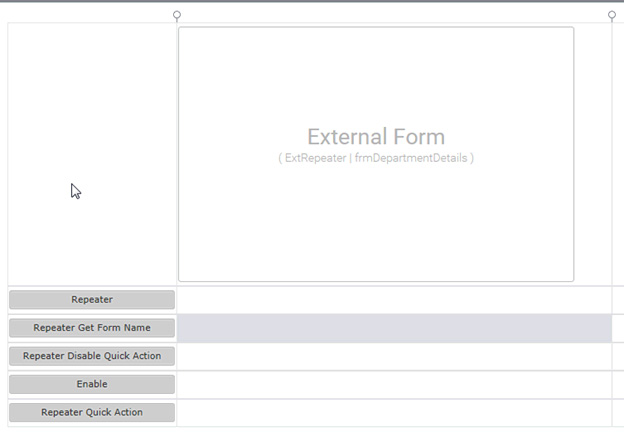
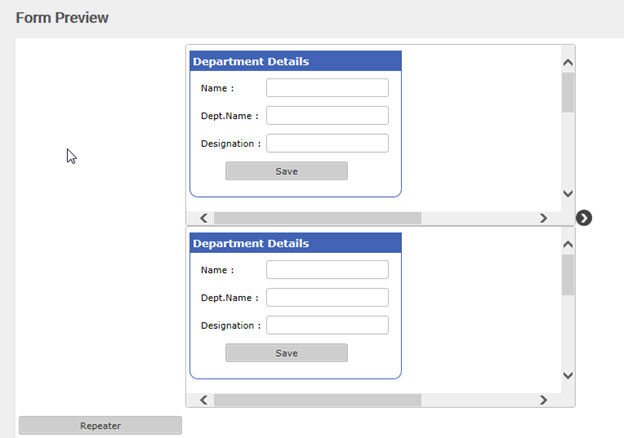
Step 1: Create a form as shown below, by dragging the control, External Form.
Figure 1: Designer
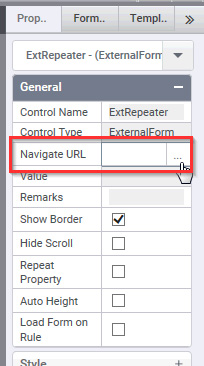
Step 2: In the ‘Properties (General)’ section of the External form, click on the ‘Navigate Url’ and select the required forms from the ‘Navigation Form’ window. If multiple forms are selected, select the form that has to be set as default in the Preview.
Figure 2
Figure 3 Figure 4
Figure 5
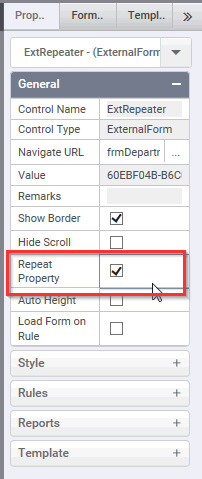
Step 3: In the ‘Properties’ section of the External form, click the checkbox of Repeat Property.
Figure 6
Various actions and rules are included, in the feature called External Form Repeater.
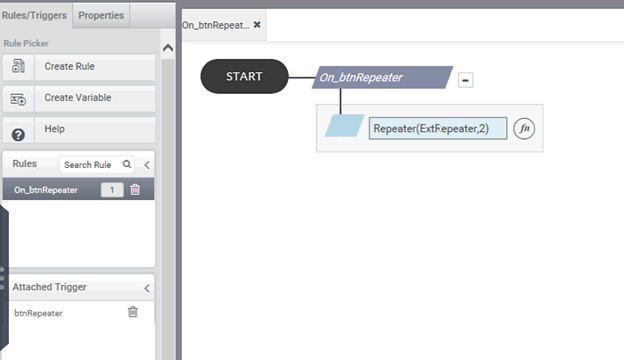
1.Repeater
It repeats the form with the current view based on the number mentioned in the parenthesis.
Step 1: Enter the rule which is same as the below mentioned syntax and append a trigger to it.
Syntax: Repeater(ExternalFormName,Count)
Example: Repeater(ExternalFormRepeater,2)
Figure 7
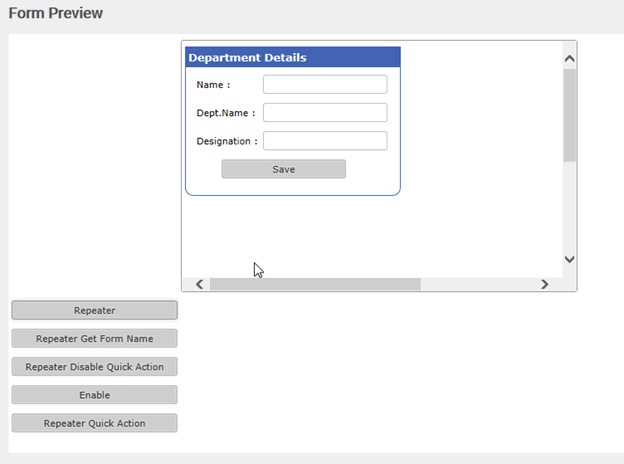
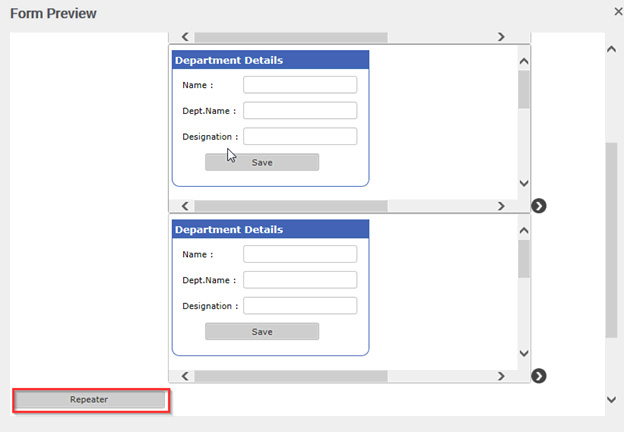
Step 2: In the Preview, on clicking on the button (‘Repeater’), the form will be repeated as per the count mentioned in the rule.
Figure 8
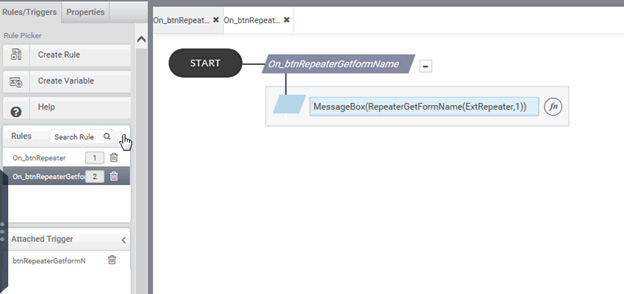
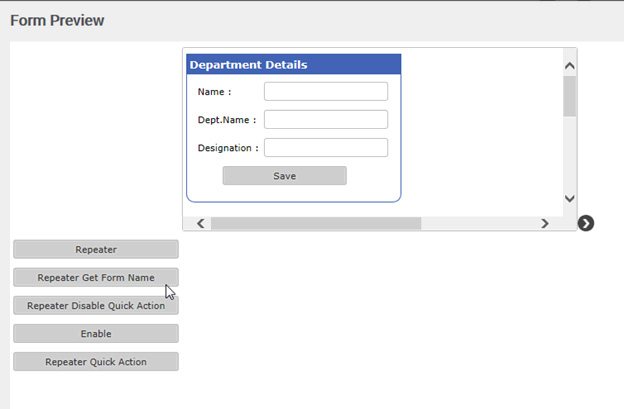
2. RepeaterGetFormName
It will give the form name appended with the form index.
Step 1: Enter the rule which is same as the below mentioned syntax and append a trigger to it.
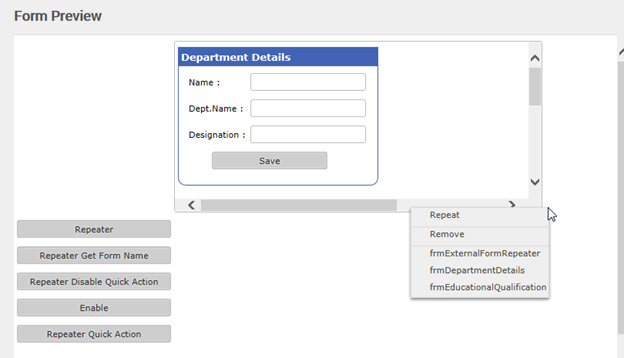
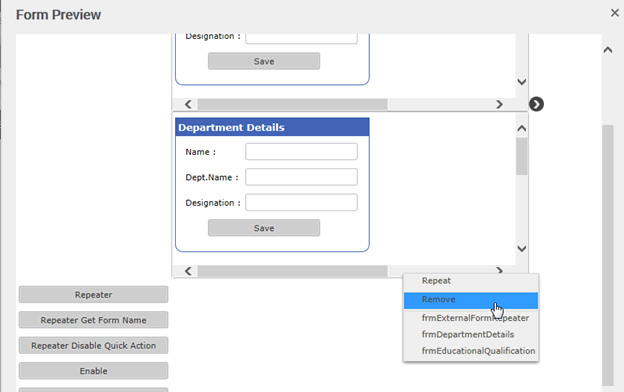
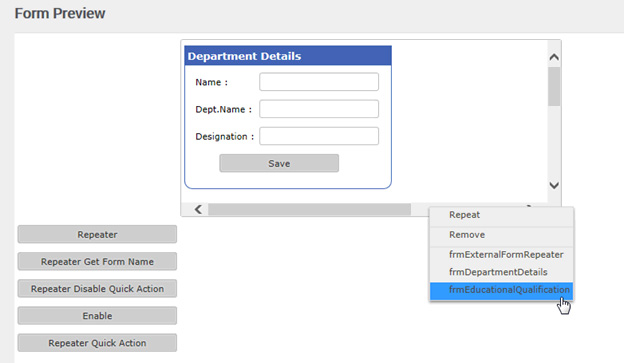
Step 2: While checking the preview, an arrow sign as shown in the figure can be viewed and by clicking this symbol, a window appears having the actions namely, ‘Repeat’, ‘Remove’ and the selected form names which is termed as ‘View’.
Figure 10
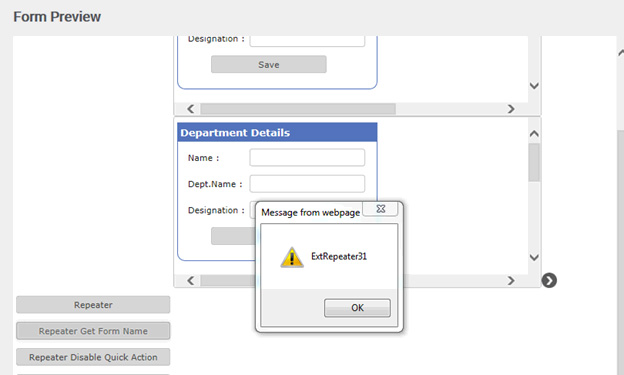
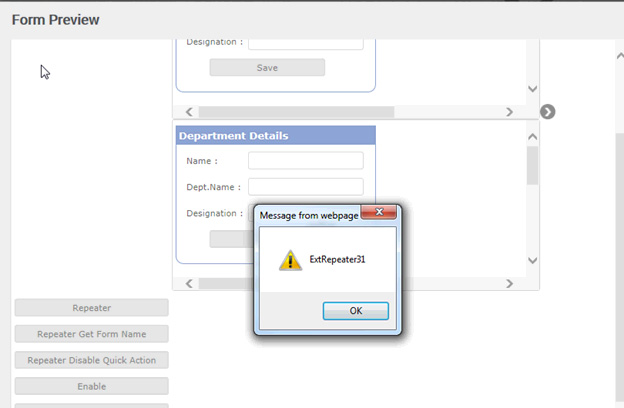
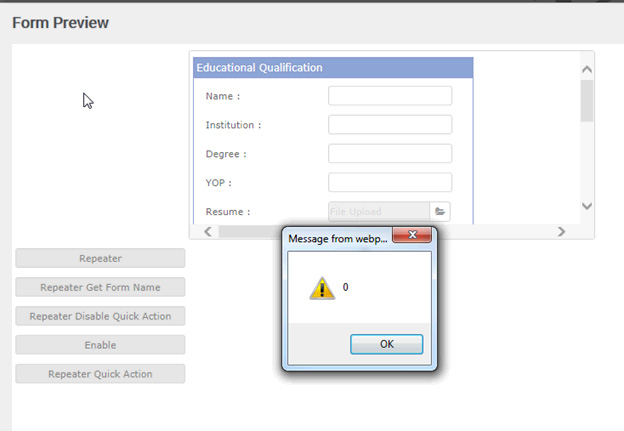
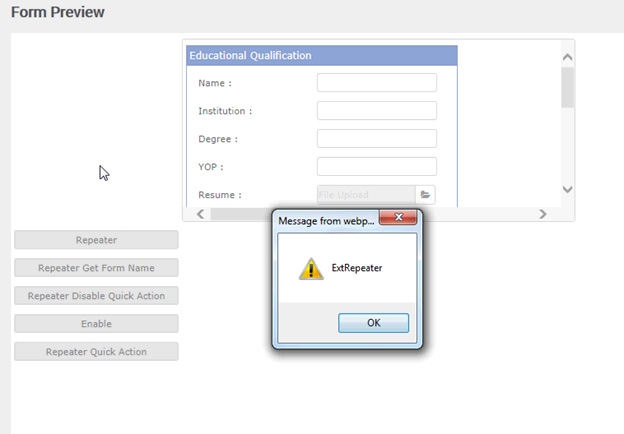
Step 3: Click the action called ‘Repeat’ and thereafter, on clicking the button (‘RepeaterGetFormName’), the message box appears showing the form name appended with the index (‘ExternalFormRepeater1’).
Figure 11
3.RepeaterQuickAction
We can enable or disable the repeating property of the external form by using this rule, instead of designer.
Step 1: Enter the rule as per the below mentioned syntax and append a trigger to it.
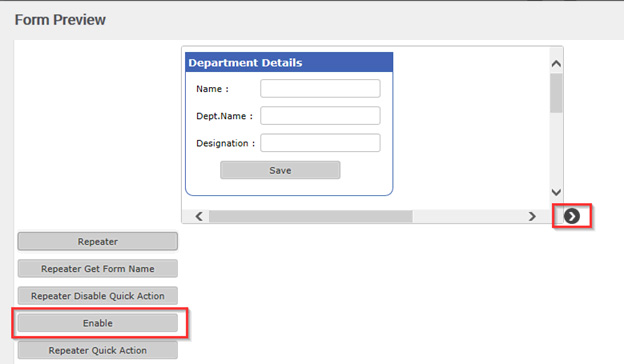
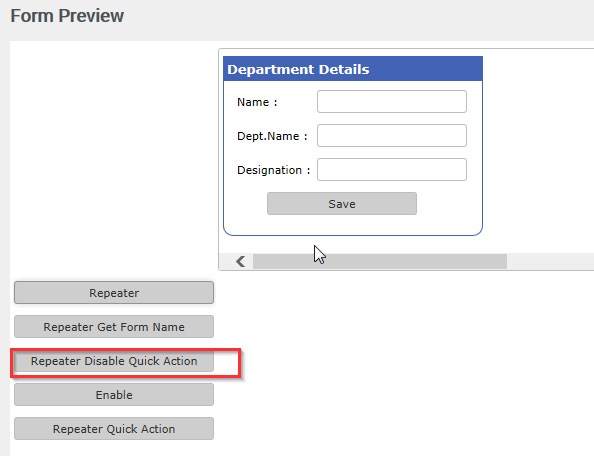
Step 2: If enable quick action is true then the actions, repeat/ remove/ change view should perform and if the enable quick action is false then none of the quick menu actions should take place. Here , if the check box of the ‘Repeat Property’ is clicked in the designer, then the condition in the rule is set as false and if the same check box is unchecked, then the condition is set as ‘true’ and it is triggered using the buttons , ‘RepeaterDisableQuickAction’ and ‘Enable’ respectively.
Figure 12: Enable Figure 13: Disable
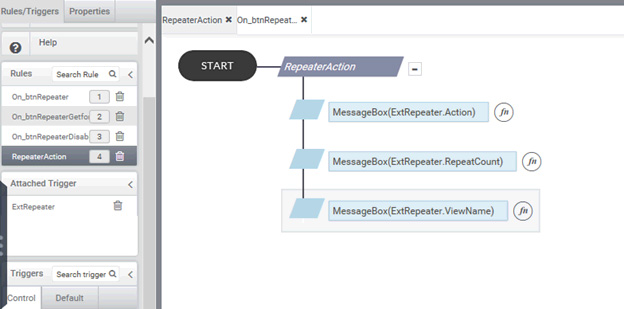
4. External form repeat properties
a. Action : This rule specifies which is the current action that occurred in the external form
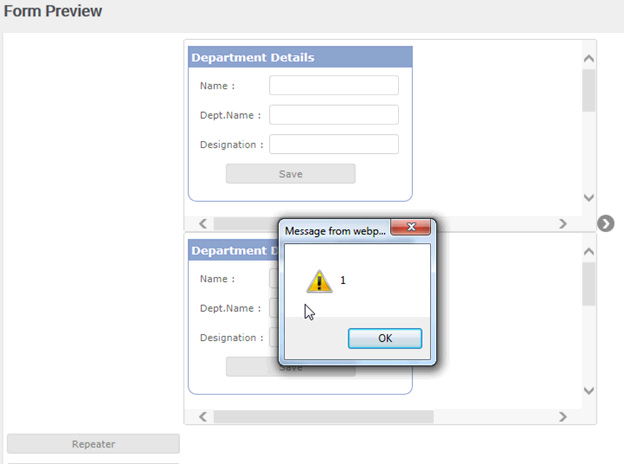
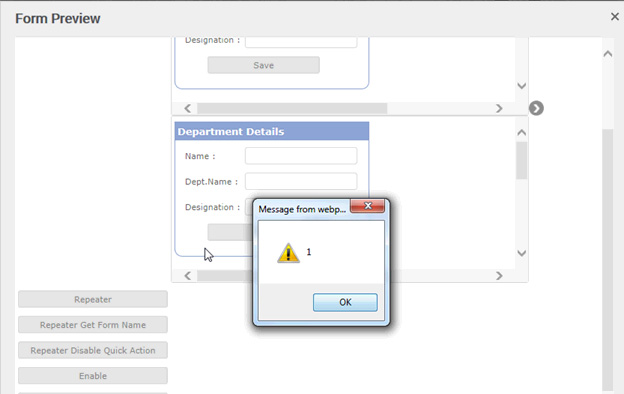
b. RepeatCount : This rule specifies the total number of times the form has being loaded.
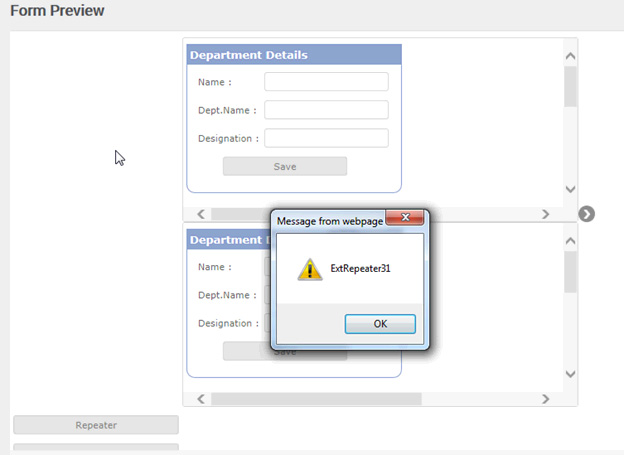
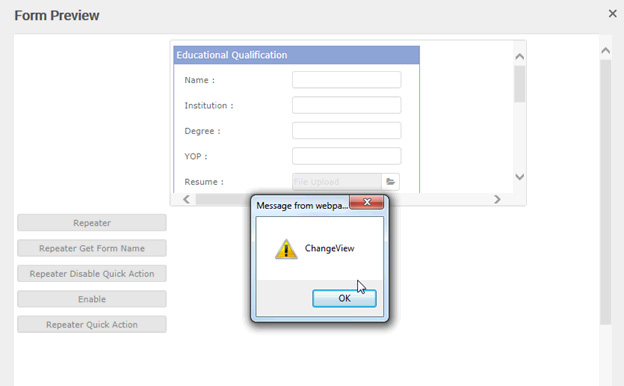
c. ViewName : This rule specifies the name of the current view that is shown in the form.
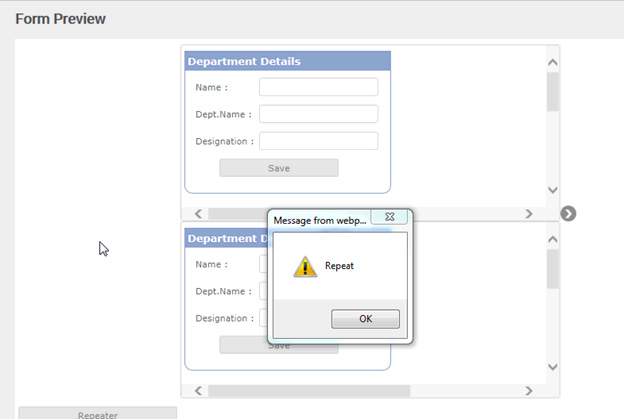
In the Preview, click on the arrow symbol and click the action ‘Repeat’ and thus the rule get executed in the formload as per the below given Figures.
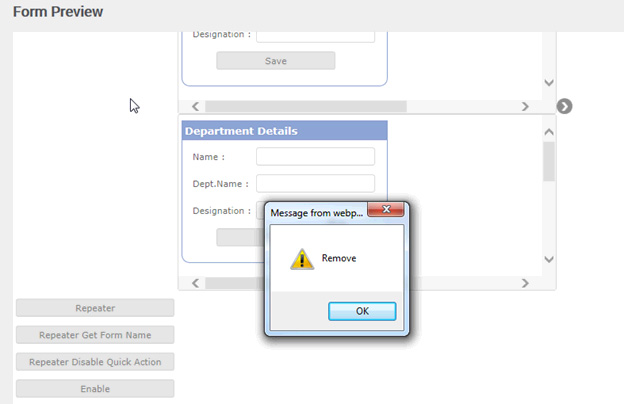
Similarly when the action ‘Remove’ is clicked, the same rule gets executed in the below displayed format.
For the Actions, Repeat and Remove, the trigger is performed ‘First’ and the action (Repeat/Remove) is performed as the next second step. Whereas when View Change is done, the action i.e. the change in the view (form that is selected) is performed as the first step and the trigger is performed as the second step.
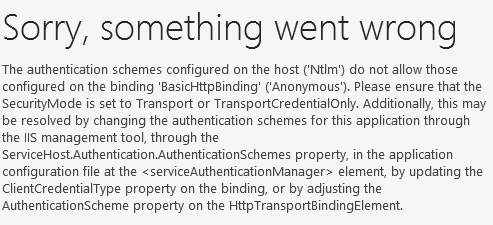
System.ArgumentException: Value does not fall within the expected range.
Exception Details
System.ArgumentException: Value does not fall within the expected range.
at Microsoft.SharePoint.SPFieldMap.GetColumnNumber(String strFieldName, Boolean bThrow) at Microsoft.SharePoint.SPListItemCollection.GetColumnNumber(String groupName, Boolean bThrowException) at Microsoft.SharePoint.SPListItemCollection.GetRawValue(String field name, Int32 iIndex, Boolean bThrow) at Microsoft.SharePoint.SPListItem.GetValue(SPField fld, Int32 columnNumber, Boolean bRaw, Boolean bThrowException) at Microsoft.SharePoint.SPListItem.GetValue(String strName, Boolean bThrowException) at Microsoft.SharePoint.SPListItem.get_Item(String fieldName)
Solution
1. Increase list view look up threshold
2. SharePoint implements meta data columns as Lookup Lists behind the scenes. If you use Share point Manager or some other tool you will notice there is a hidden list at the Site Collection Level “TaxonomyHiddenList”. Every hour the “Taxonomy Update Scheduler” Timer Job is responsible for syncing this list with Central Term Store Management. This is really the list your columns are syncing with.
3. SharePoint 2010 introduced the concept of Resource Throttling at the Web Application level. There is a limit placed on the number of lookup lists that can be included in a query. And this setting is different for Administrators and Regular Users.
To find the setting go to Central Admin -> Application Management->Manage Web Applications. Select General Settings->Resource Throttling. The default values are as follows. I increased our List View Lookup Threshold to 18 to accommodate our queries: