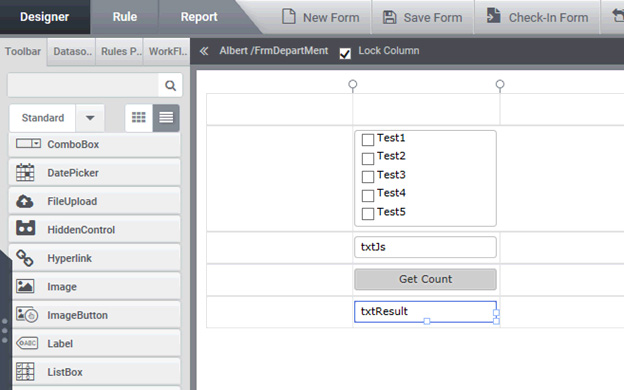
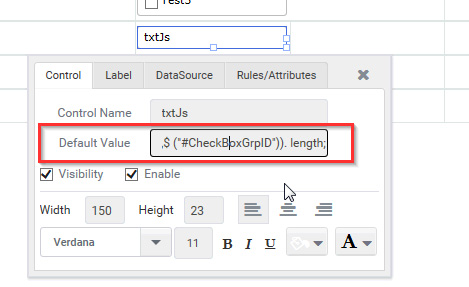
You can change ‘chkgroup’ to your checkbox group name.
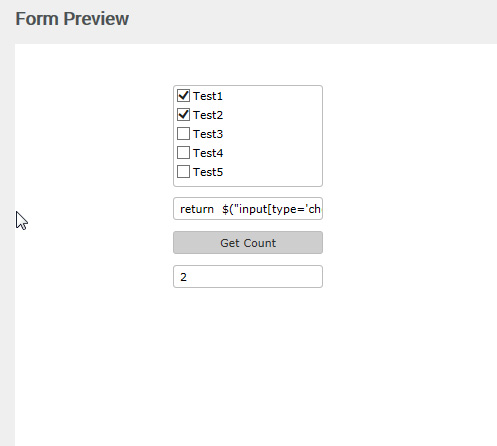
Preview :
Figure 4
Select the items in the check-box group and click on ‘Get Count’ button then the count of selected check-boxes will be shown in the text-box ‘txtResult’.
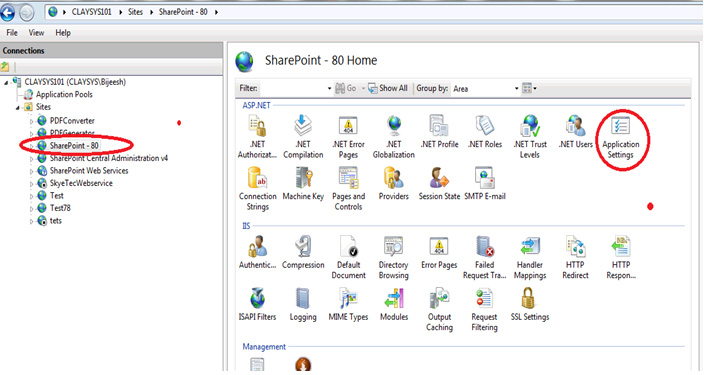
4.Select the site where you installed the AppForms ,in the below example we have installed the AppForms in the SharePoint:80 site
5.Once you select the site, go to the Application settings of that site as marked in red above .
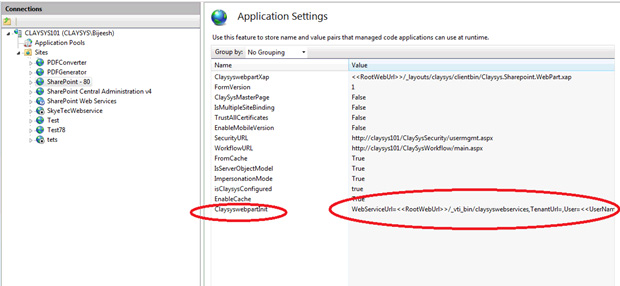
6.Once you double click the application settings it will show a screen like below
7. Now select the ClaysysWebpartInit setting , once it is open
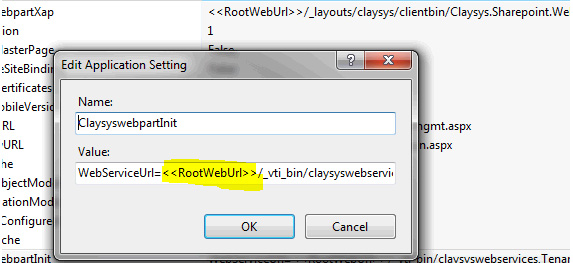
8. Replace the <<RootWebUrl>> (it can be some different URL instead of <<RootWebUrl>>) with your host name which you have added in step 2, please note the host name should match the name in the certificate, if it is a wild card certificate then please add the fully qualified URL.
The INNER JOIN selects all rows from both tables as long as there is a match between the columns specified in the relationship tables. In the below example, we will be joining two SQL Tables namely, CustomerDetails & CustOrderDetails in order to list out all the orders completed by a particular customer.
Below are the steps to achieve that.
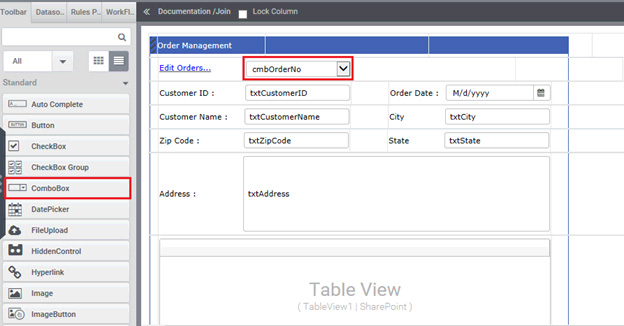
Step 1: Create a form as shown below
Drag and drop a ComboBox control from the group ‘Standard Controls’.
Design a form as shown below that contains a ComboBox control.
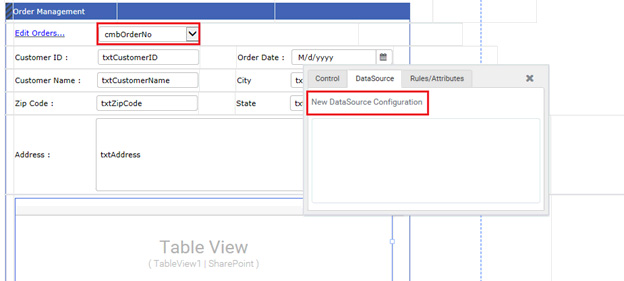
The below shown form is designed to view the order details of a customer.
The drop down named ‘cmbOrderNo’ has to be configured such that the drop down list outs all the Orders No’s placed by the logged on customer .
Further steps to configure the drop down has been explained in Step 2.
Step 2: Configuring the drop down ‘cmbOrderNo’ with SQL table
Select the ComboBox control in the designed form.
Quick menu gets open up next to the ComboBox control upon selection.
Click on the link ‘Create New DataSource’ from QuickMenu.
4. A new window ‘DataSource’ gets open up upon clicking the link ‘New DataSource Configuration’.
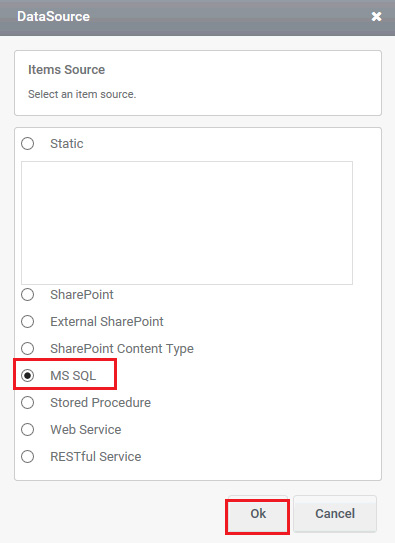
5. Select the source type as ‘MS SQL/SQL Azure’ for configuring the control with SQL.
6.Click on button ‘OK’ to proceed with the configuration.
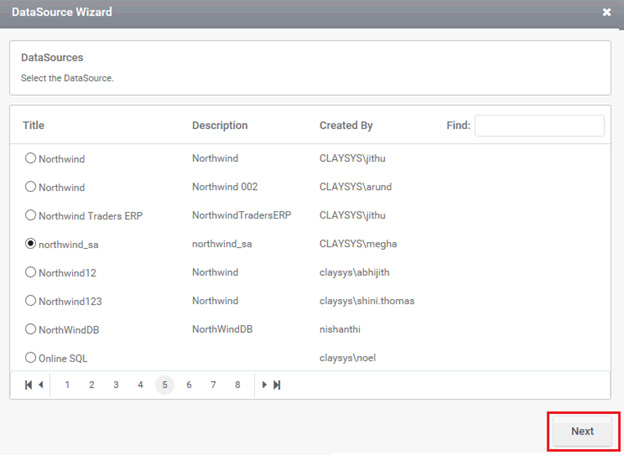
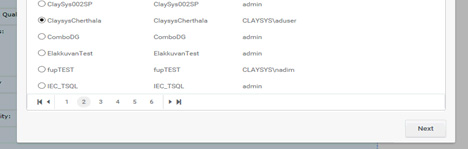
7. Another window gets open up to select the data source.
8.Select the data source to which the control has to be configured from the data sources listed in the window.
9. Click on button ‘Next’ to proceed with the configuration.
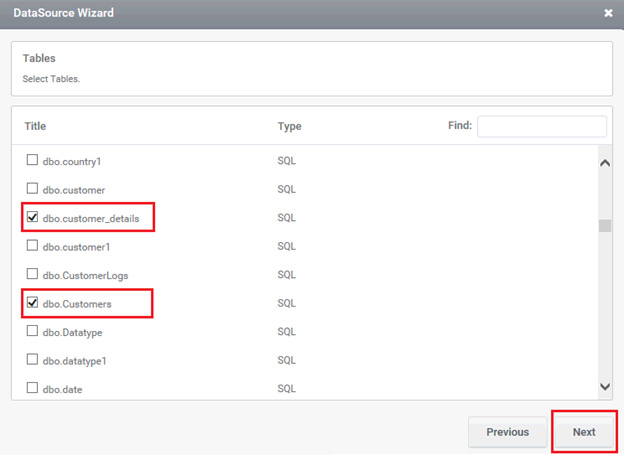
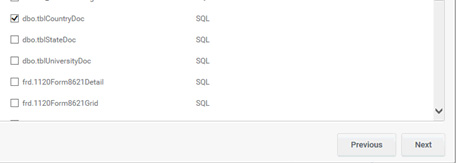
Step 3: Select two SQL Tables from the available listed Tables (CustomerDetails & CustOrderDetails).
Click on the button ‘Next’ to proceed with the configuration upon selecting the two tables from the window.
Step 4: Select the criteria
Select the criteria based on which the drop down has to be filled.
Here ID of the user logged in is given as the criteria to fill the drop down.
Click on button ‘Next’ to proceed with the configuration.
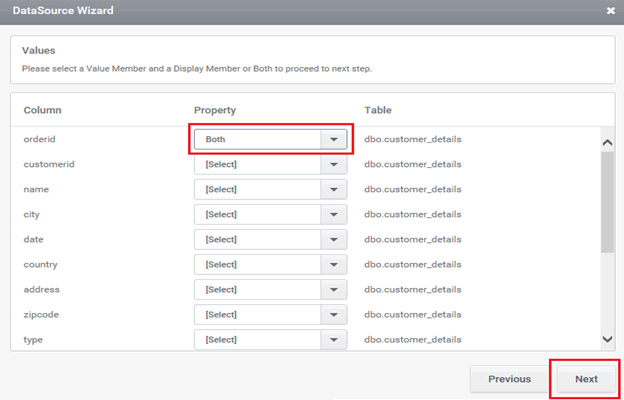
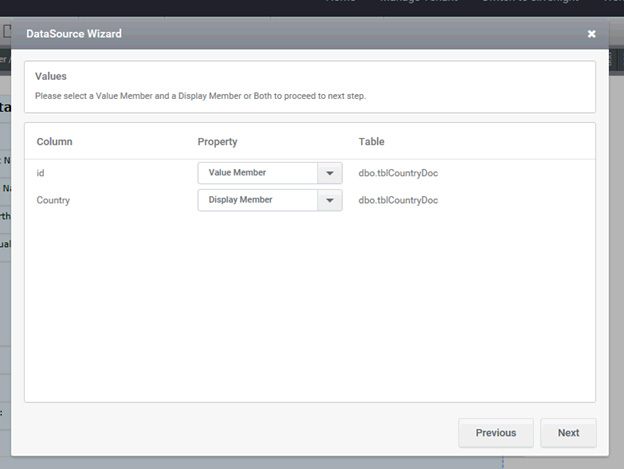
4. Set a column in the table as ’Value Member’ another column in the table as ‘Display Member’
5. A ‘Both’ option is also available to set a same column as both the’ Value Member’ and ‘Display Member’.
6. Click on ‘Next’ button to proceed with the wizard.
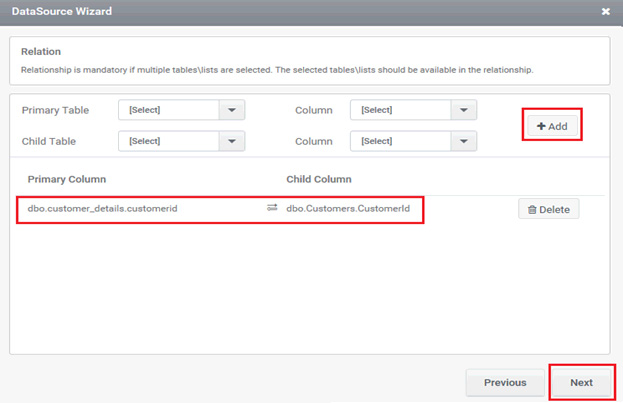
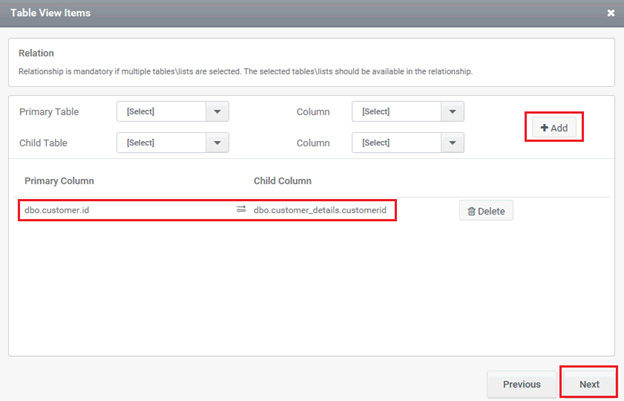
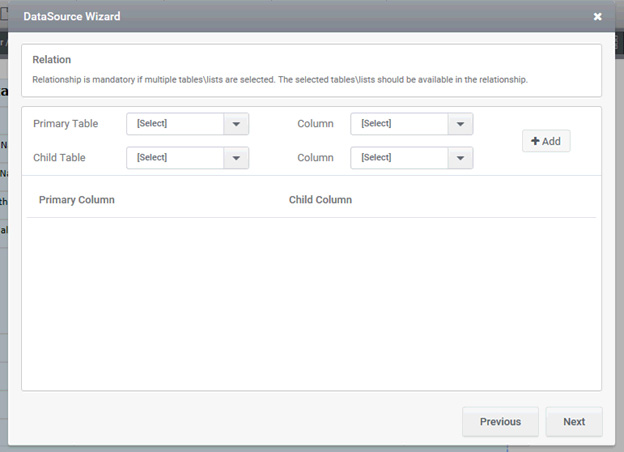
Step 5: Configure the ‘Relation’ wizard
Select the primary table and the column name from the respective drop downs for which inner join is performed.
Select the child table and the column name that has to be mapped with the column in primary table from the respective drop downs.
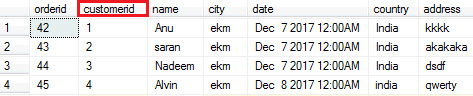
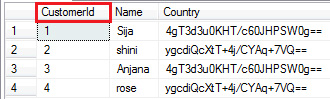
Here in this context, the ’CustID’ column from parent table ‘CustomerDetails’ is mapped with the column ‘ID’ from Child table ‘CustOrderDetails’.
The data type of both the columns should be of type numeric.
Note: The INNER JOIN selects all rows from both tables as long as there is a match between the columns specified in the relationship tables.
5. Click on button ‘Add’ so that the selected relationship among tables get added to the wizard.
6. The user can view all the relationships added among tables in the wizard.
7. In order to delete an added relationship among tables, click on the button .
8. Click on button ‘Next’ to proceed with the configuration.
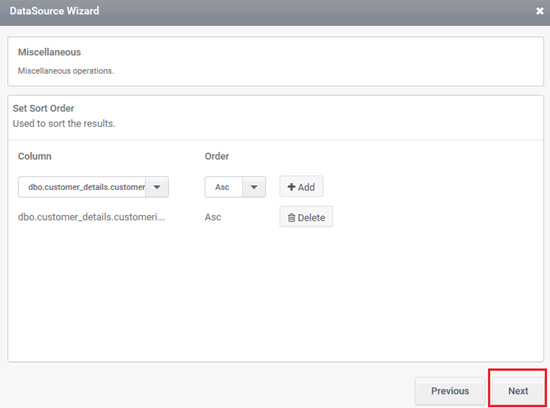
Step 6: Set a sort order and add trigger
Select the column that has to be sorted from the drop down. Also select the order by which the column has to be sorted from the drop down.
Add a trigger to populate the ComboBox control using the button ‘Add Trigger’. Here the hyper link button, ’hlEditOrder’ is set as the trigger to populate the ComboBox control.
Click on button ‘Finish’ to complete the configuration. The pop up gets closed automatically.
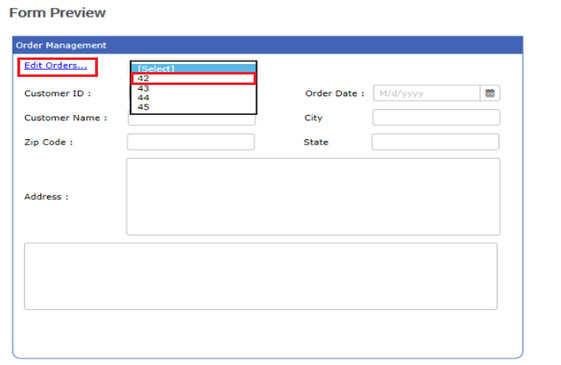
Step 7: FormPreview
Upon viewing preview, you shall get the output like the one below, in which the two Tables are joined together based on the ID.
Click on the hyper link ‘Edit Orders’ which acts as a trigger to populate the drop down.
The drop down gets populated with result on inner joining two tables.
The Cascading Drop down Menu allows you to drill down through hierarchical data by using one drop down menu as a filter into the next.
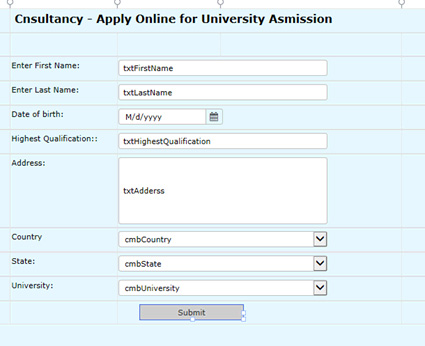
Step 1: Creating AppForm and creating SQL tables.
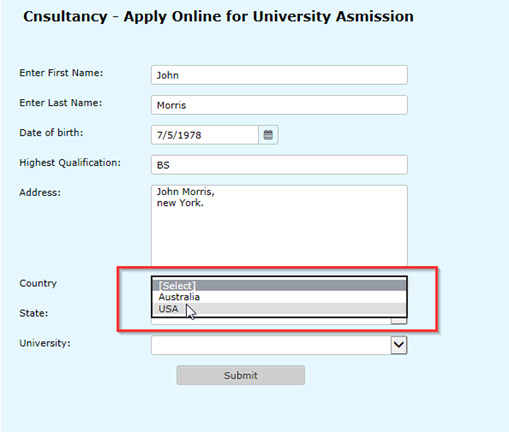
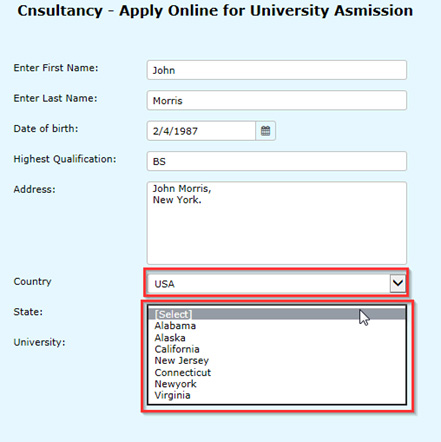
I have configured below form to submit an on line application for the consultancy. When the user selects “Country” from combo box, States should populated in “State” combo box and when the user selects “State” University names should be populated in “University” combo box.
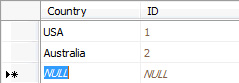
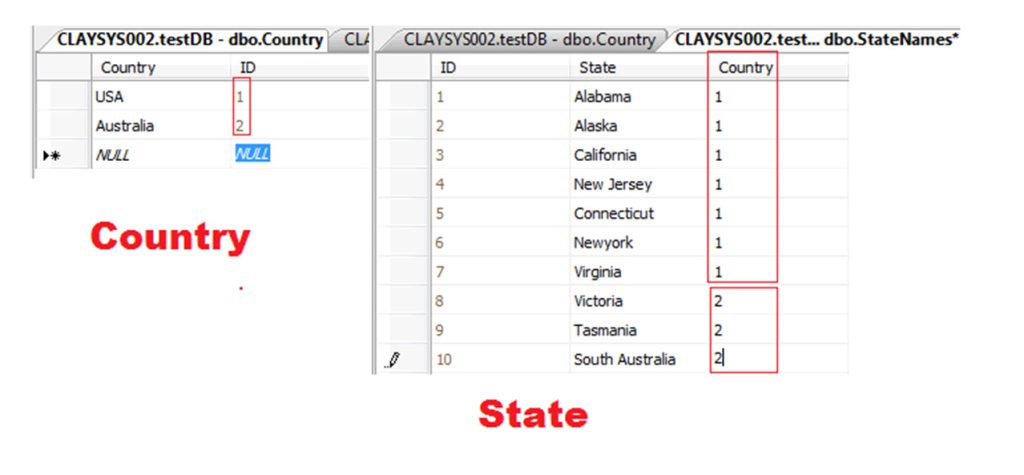
After adding controls to the form, I have created below table for country.
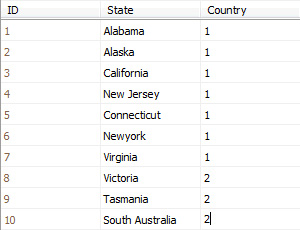
I have created the table below for States. I have created one more column for saving country IDs.
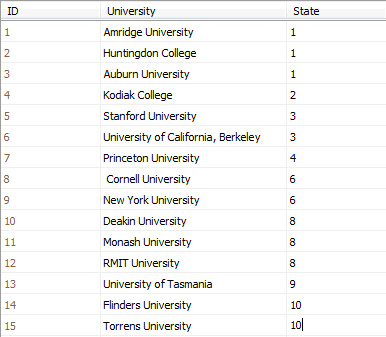
I have crated table below for populating University names in the combo box. I have created one more column for saving state IDs.
Step 2: Configuring combo box with SQL DataSource
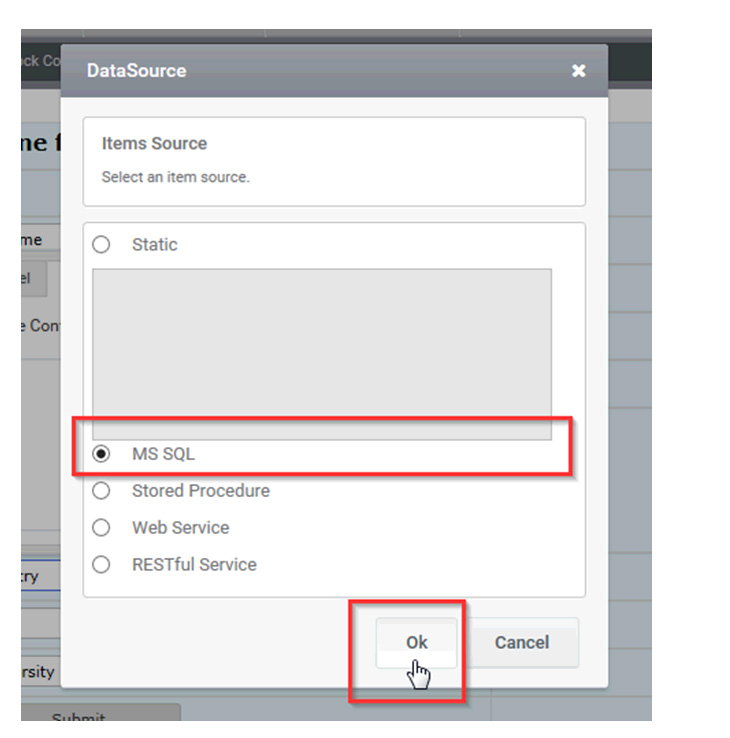
Click on the combo box called “cmbCountry” and click “New DataSource configuration” from DataSource.
DataSource window will be displayed and you can select “MS SQL” as DataSource and click “Ok” button.
Select the Database in the next window.
Note: This DataSource should be created using “DataSource Settings” in the left navigation menu of AppForms. Then only this DataSource name will be displayed in the DataSource wizard.
Choose table name and click “Next”.
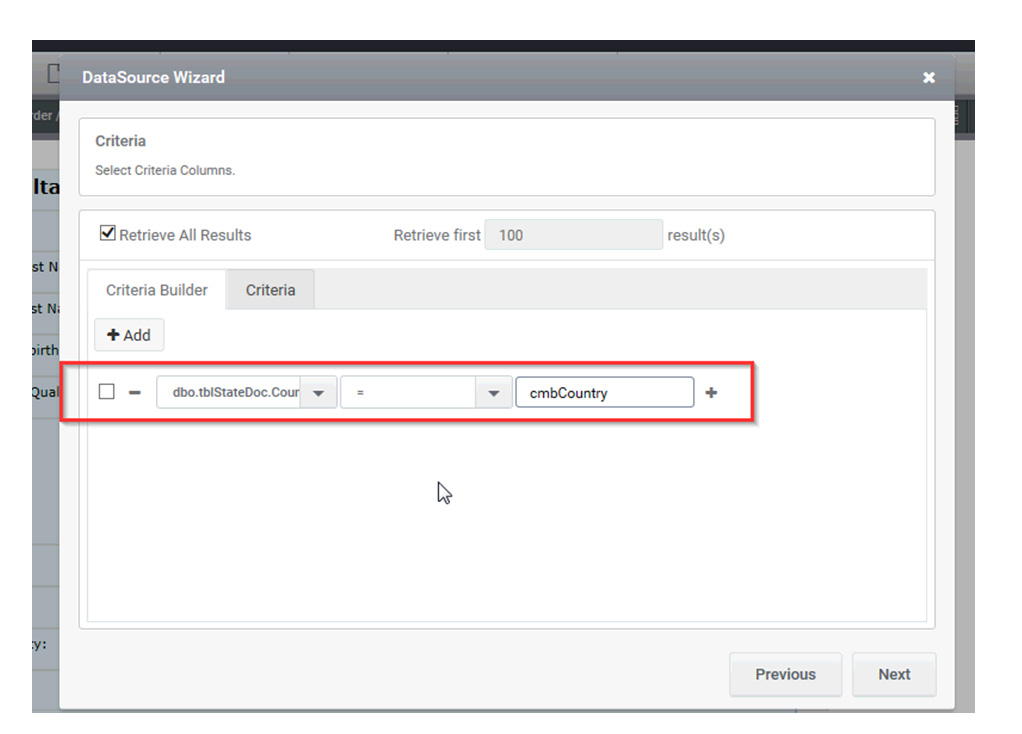
Click “Add” button in the criteria window to add the criteria below.
Click “Next” button.
Select the value member and display member from DataSource wizard. ID = Value member and Country = Display member.
Click “Next” button.
Click “Next” in the relation window as we are not going to choose any relationship.
Click “Add Trigger” in the miscellaneous window. Before clicking “Add Trigger” if you need to display items in an ascending order, select the column name from “Column” and “Asc” from ascending order and click “Add” button without fail.
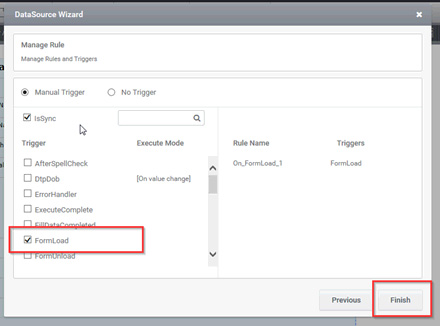
Choose “FormLoad” as a trigger and click “Create Rule” in the Manage Rule window.
Click “Finish” to complete the configuration for “cmbCountry” combo box.
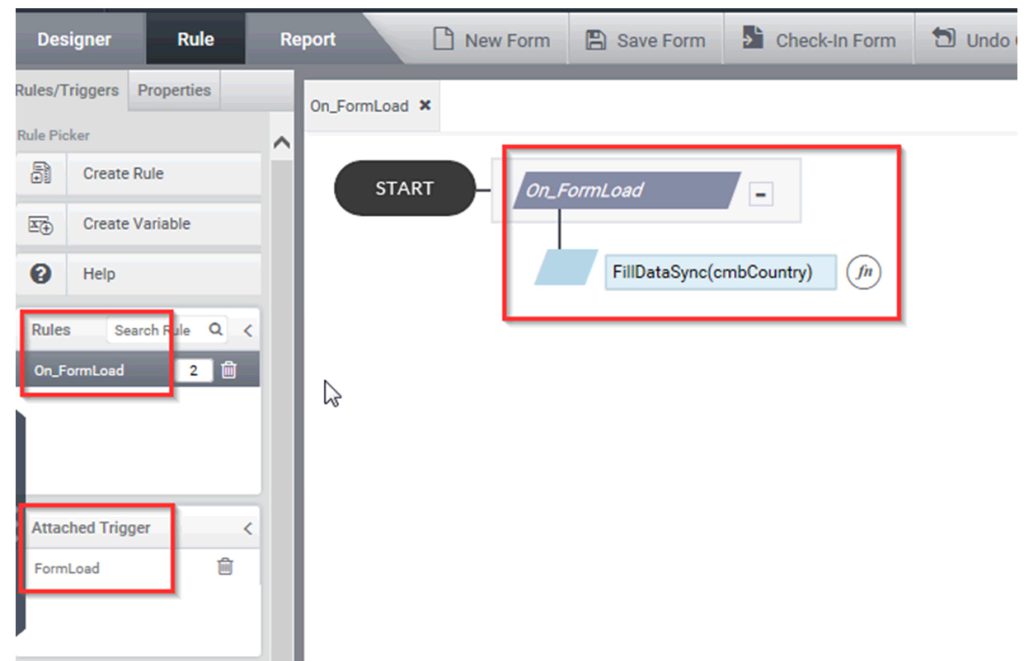
You can see that new rule was added with “Formload” as a trigger. You can see this when you click “Rule” tab.
Click “Preview”. You can see that country names are populating in combo box.
When the user selects “USA” from Country, state names should be populated in the next combo box
Configure “cmbState” combo box like how you configured “cmbCountry” up to selecting the table.
StateNames.Country = cmbCountry (First combo box for selecting the country).
Click “Next” to continue (follow the configuration steps of “cmbCountry” combo box). Select “ID” as Value member and “State” as display member.
Add “cmbCountry” as trigger and complete the configuration.
When you select “USA” from combo box, you can see that value member = “1” and display member = “USA”.
After you selected “USA” from combo box, it will display all the states with value member = “1” in the state combo box. Please compare above “Criteria Builder” figure with below figures of tables for the better understanding.
Click “Finish” to complete the configuration for “cmbCountry” combo box.
You can see that new rule was added with “Formload” as a trigger. You can see this when you click “Rule” tab.
Click “Preview”. You can see that country names are populating in combo box.
When the user selects “USA” from Country, state names should be populated in the next combo box.
Configure “cmbState” combo box like how you configured “cmbCountry” up to selecting the table.
StateNames.Country = cmbCountry (First combo box for selecting the country).
Click “Next” to continue (follow the configuration steps of “cmbCountry” combo box). Select “ID” as Value member and “State” as display member.
Add “cmbCountry” as trigger and complete the configuration.
When you select “USA” from combo box, you can see that value member = “1” and display member = “USA”.
After you selected “USA” from combo box, it will display all the states with value member = “1” in the state combo box. Please compare above “Criteria Builder” figure with below figures of tables for the better understanding.
Click “cmbUniversity” and follow above steps that you followed for “cmbCountry” and “cmbState” upto selecting the table.
Give a criteria like below.
Give “cmbState” as a trigger and complete the configuration.
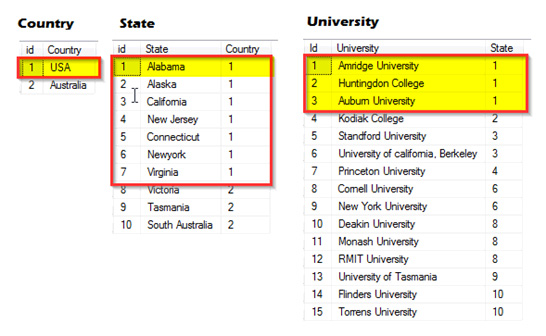
Below figure of tables will explain it clearly.
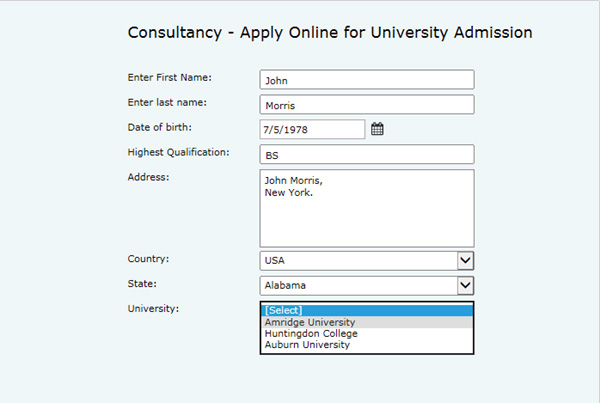
When you select “USA” in the first combobox “Alabama”, “Alaska”, “California”, “New Jersey”, “Connecticut”, “NewYork” and “Virginia” will be displayed in the second combobox . When you select “Alabama” from second combobox “Amridge University” and “Huntingdon College”, “Auburn University” will be displayed.