Workflow
A workflow is a systematic approach to defining, executing, and automating business processes. It involves the passing of tasks, information, or documents between participants according to predefined procedural rules. These workflows can be executed through sequential or parallel steps to achieve specific business objectives.
Workflow Dashboard
Accessing the Workflow Dashboard
- Navigate to Tenant Settings:
- From the Links tab, click on Tenant Settings.
- Enable Workflow Link:
- In the Tenant Settings menu, locate the option Show WorkFlow Link and turn it on.

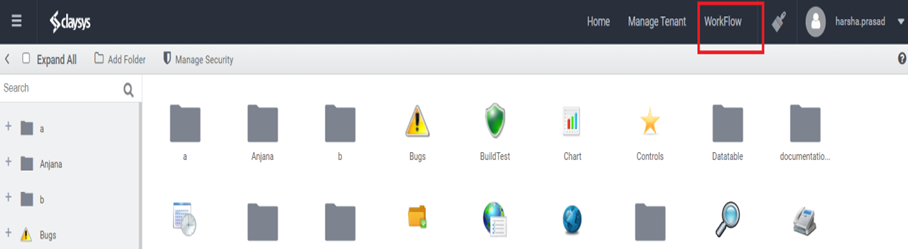
- Access the Workflow Link:
- Once enabled, the Workflow link will appear on the top banner of the interface.
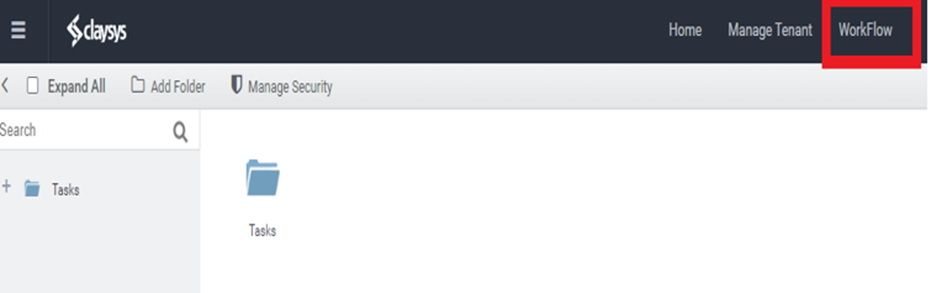
- Redirect to Workflow Dashboard:
- Click on the Workflow link to be redirected to the Workflow Dashboard.
Dashboard Overview
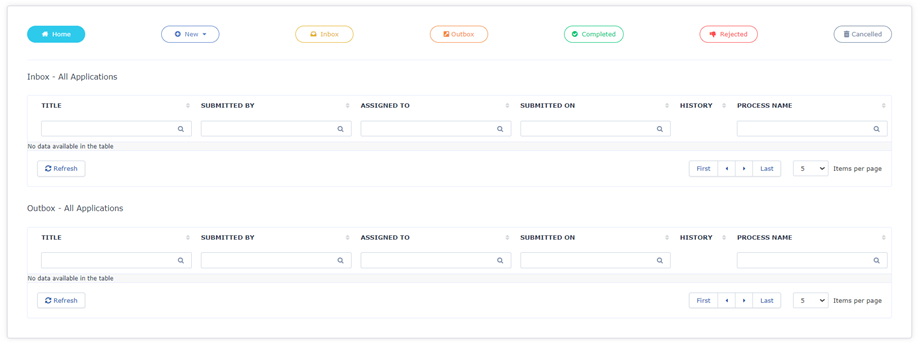
The Workflow Dashboard provides a central location for managing various aspects of workflow processes. It contains the following sections:
- New:
- Displays the available workflows for selection when the user clicks on the “New” menu.
- Inbox:
- Displays workflows that have been submitted and require the user’s action.
- Outbox:
- Contains workflows that have been submitted and on which the user has already taken action.
- Rejected:
- Workflows that have been rejected are available in the Rejected section for users involved in the workflow.
- Completed:
- Workflows that have been completed are available in the Completed section for users involved.
- Cancelled:
- Workflows that have been cancelled are available in the Cancelled section for involved users.
Setting Up a Workflow
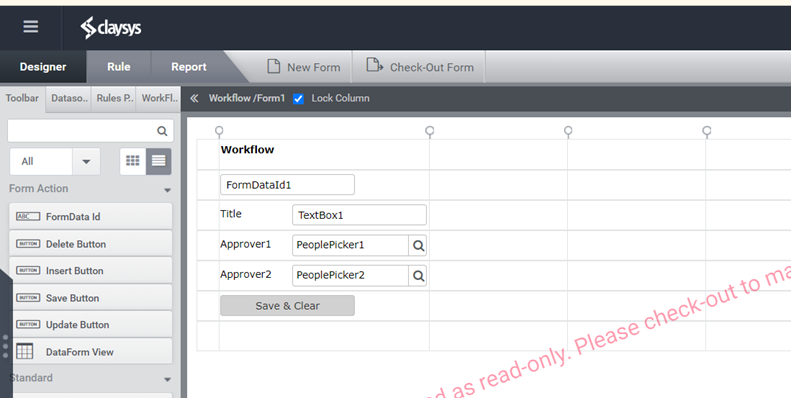
1. Configure a Data Form
To set up a workflow, you need to configure a data form. Follow these steps to complete the configuration:
- Drag FormDataID:
- Begin by dragging the
FormDataIDcontrol onto the data form. This control will uniquely identify the form data in the workflow process.
- Begin by dragging the
- Add a Textbox for Workflow Title:
- Drag a textbox control onto the form. Label it appropriately for entering the “Workflow Title.” This will allow users to input a descriptive title for the workflow when initiating it.
- Add People Pickers for Approvers:
- Drag desired no. of People Picker controls onto the form. These controls will be used to select the approvers for the workflow.
- Add a Save Button:
- Drag a button control onto the form. Change the button’s click action to
SaveDataForm. This will enable users to save the data entered into the form.
- Drag a button control onto the form. Change the button’s click action to
- Save and Check in Form:
- After configuring the form with the required controls and actions, save your changes. Make sure to check in the form to ensure that all modifications are preserved and available for use in the workflow.
Workflow Mapping
Creating a New Workflow
- Initiate Workflow Creation:
- To create a new workflow mapping, click on “Create Workflow”. Ensure that you have checked in the corresponding form before initiating the creation process.
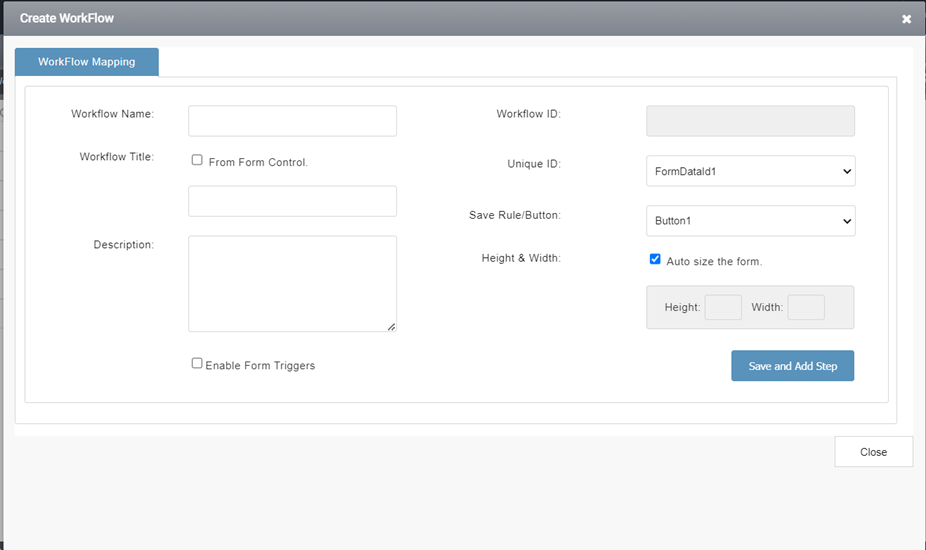
Workflow Mapping Details
- Workflow Name:
- Enter a custom name for the workflow in the textbox adjacent to the Workflow Name field. This name will be displayed in the Workflow Dashboard and helps users identify the purpose of the workflow easily.

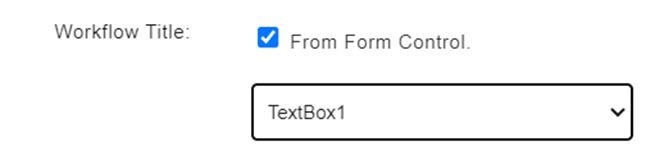
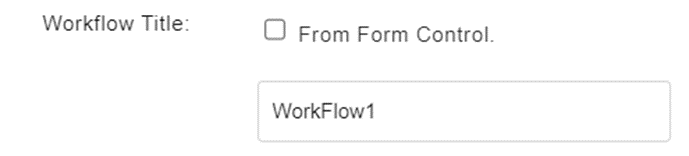
- Workflow Title:
- Checkbox Enabled: When the Workflow Title checkbox is checked, the title can be taken from the form control.
- Checkbox Disabled: If the checkbox is unchecked, users can enter a custom title. This title will be used for the workflow item in the dashboard.
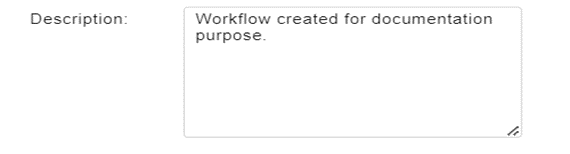
- Description:
- The Description field is optional. Provide a brief description of the workflow to help users understand its purpose and functionality. This field is for user convenience and is not a required field.
- Workflow ID:
- The Workflow ID is a unique identifier automatically generated when the workflow is created. This ID ensures that each workflow can be uniquely referenced.

- Unique ID:
- The Unique ID serves as the primary key for the form. It links the form to the created workflow items. In the Workflow Mapping page, you can map the form control to the Unique ID field, which will act as the primary key. This ensures that specific controls are linked to the workflow items, enabling accurate data retrieval when an approver accesses the item from their dashboard.

- Save Rule/Button:
- Map the Save button from the form to the workflow. Clicking this button will save the form data and initiate the workflow. Note that this button only initiates the workflow at the initial step. After that, it functions as a standard form button for saving data.

- Height & Width:
- Specify the Height and Width of the form. These settings will adjust the form’s size in the AppView. If “Auto size the form” is checked, the given height will be used as the default height and width for the form, ensuring a consistent appearance.

- Save and Add Step Button:
- After entering the required data on the Workflow Mapping page, click the “Save and Add Step” button.

- Action: This button saves the current workflow mapping data and internally adds workflow-related rules to the form.
- Navigation: The system navigates to the Workflow Step page for the first approver the initiator step is created internally during this process.
Workflow Steps
Components
- Step Title:
- The Step Title field allows you to specify a title for each step added to the workflow. The number of steps corresponds to the levels of approvers required for the workflow.

- Step Code:
- Step Code is a unique identifier assigned to each step. This code is used internally by the system for reversing or forwarding steps within the workflow.

- Step No:
- Step No displays the current step number in the workflow. This number is automatically generated and reflects the step’s position in the workflow sequence.

- Approver Type:
- Initiator Step:
- The initiator step can be assigned to a User/Group. This can be a single user, a group of users, or multiple users, depending on the user’s choice. Users in the initiator step can only view the workflow items in the “New” menu on their dashboard.
- Initiator Step:
- Other Steps (Excluding Initiator Step):
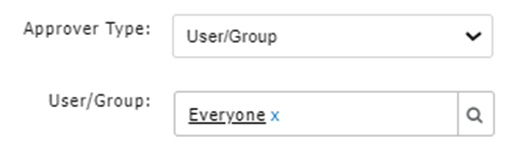
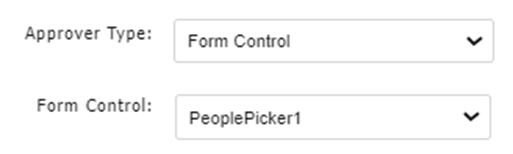
- For subsequent steps, the Approver Type can be one of two options:
- Form Control: Allows specifying a control from the form for approval.
- User/Group: Requires mentioning specific approvers.
- For subsequent steps, the Approver Type can be one of two options:
- Parallel Workflow:
- Checking the Parallel Workflow checkbox enables the “Configure” button. Clicking this button opens the Parallel Step Configuration window, allowing you to set up parallel processing steps in the workflow.

Workflow Tools
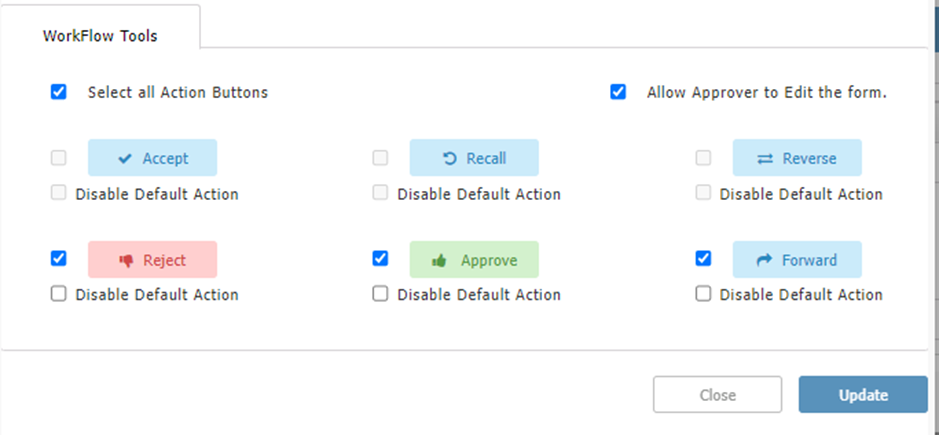
- Workflow Tools Panel:
- In this panel, you can select which buttons are enabled for the current step. For example, if “Recall” and “Reverse” are disabled in the workflow step configuration, these action buttons will not be available to the approver.
- Allow Approver to Edit the Form:

- If “Allow Approver to Edit the form” is unchecked, the form will not be editable by the approver. This setting restricts the approver’s ability to modify the form contents.
Functionality of Workflow Buttons
Workflow buttons are critical for managing and triggering workflow actions at various stages. Below are the details and functionalities of each button available in the workflow process:
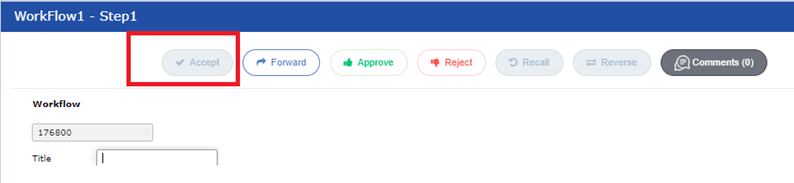
1. Accept
- Functionality:
- If the Accept button is enabled on the Workflow Step page, users must accept the request to proceed with other actions. If it is disabled, users can access all selected actions directly.
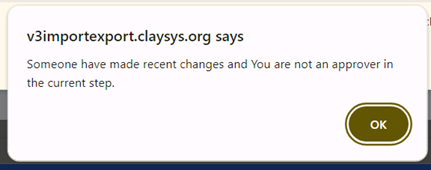
- Sequential Workflow Pattern:
- When a workflow is accepted by any one of the “Assigned To” users, the rest of the users in this group cannot access the workflow request. If any other “Assigned To” user attempts to access the request after another user has accepted it, a message box will appear.
- Parallel Workflow Pattern:
- In a parallel workflow pattern, the Accept button is disabled. Multiple users can click the Approve button simultaneously.
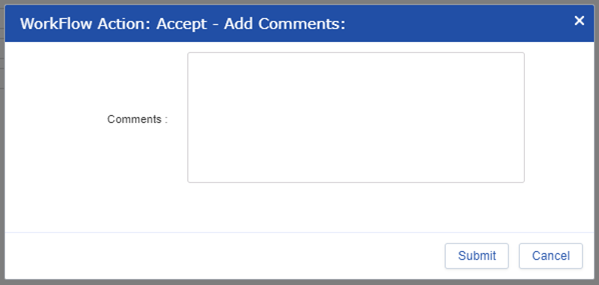
- Accept Pop-up:
- The Workflow Accept pop-up is shown as illustrated in figure below.
- Accept Action Rule:
- Rule Name: WorkFlowAccept (Comments,Alert User)
- Parameter 1: Comments (Required) – Comments for accepting the workflow.
- Parameter 2: Alert User (Required) – E-Mail User upon executing this rule.

2. Approve
- Functionality:
- The Approve button is used to approve the request.
- Sequential Workflow Pattern:
- When any “Assigned To” user in the step approvers approves the request, it moves to the next step. The request then escalates to the next step approvers, continuing this process until completion.
- Parallel Workflow Pattern:
- Approval in a parallel workflow occurs based on predefined conditions, which will be explained in detail later.
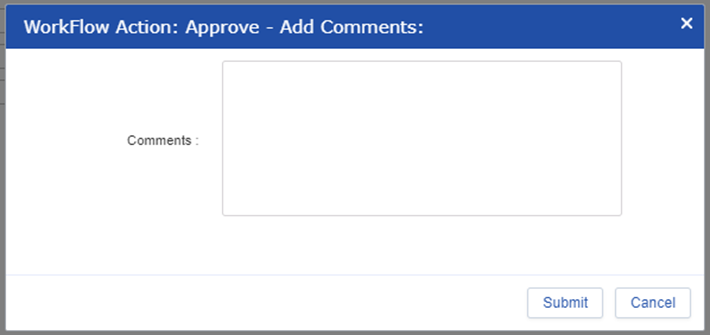
- Approve Pop-up:
- Clicking the Approve button displays a pop-up window for adding comments regarding the approval.
- Approve Action Rule:
- Rule Name: WorkFlowApprove(Comments, Alert User, StepCode)
- Parameter 1: Comments (Optional) – Add comments regarding the approval.
- Parameter 2: Alert User (Optional) – Users receive email notifications about the approval.
- Parameter 3: StepCode (Optional) – Specifies the step code to which the approved request should move.
- Post-Approval:
- After approval, the request moves to the Outbox. It can be recalled from there, and other buttons will be disabled.
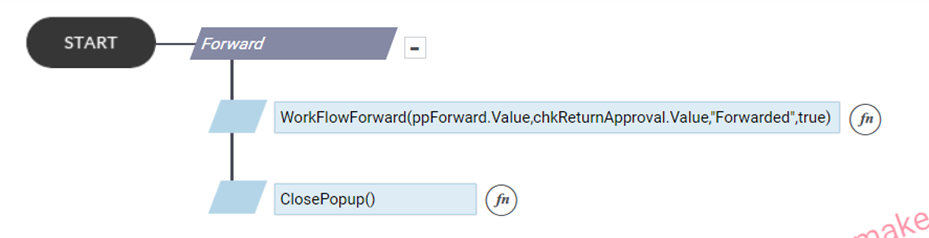
3. Forward
- Functionality:
- The Forward button allows approvers to forward the request to approvers in another step.
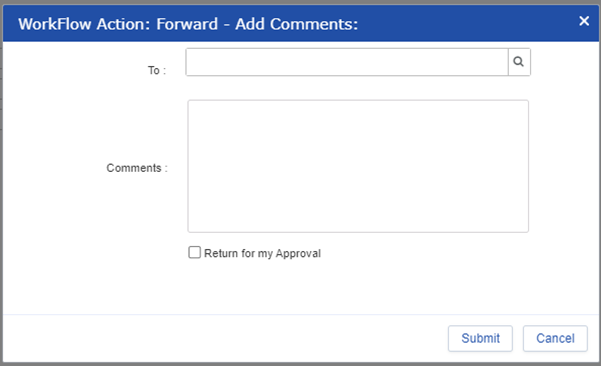
- Forward Pop-up:
- Clicking the Forward button opens a pop-up window where you specify the recipient’s name and add comments regarding the forwarding action.
- Forward Action Rule:
- Rule Name: WorkFlowForward(Forwarded User Name, Return For Approval, Comments, Alert User)
- Parameter 1: Forwarded User Name (Required) – Name of the user to whom the workflow should be forwarded.
- Parameter 2: Return For Approval (Required) – Return to the forwarder after the forwarded user takes any action.
- Parameter 3: Comments (Optional) – Add comments regarding the forward action.
- Parameter 4: Alert User (Optional) – Users receive email notifications about the forward action.
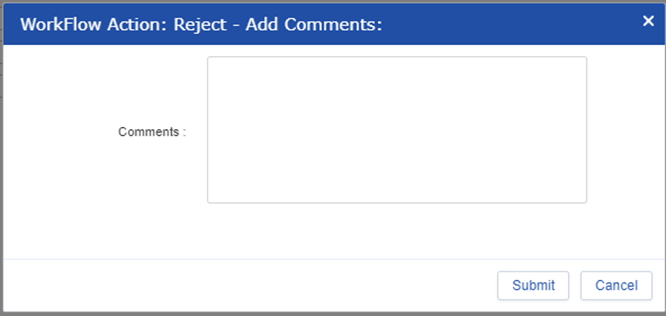
4. Reject
- Functionality:
- The Reject button is used to reject the request.
- Sequential Workflow Pattern:
- Rejection by any approver in the same step prevents the request from moving to subsequent steps.
- Parallel Workflow Pattern:
- In a parallel workflow, rejection operates based on specific parallel conditions.
- Reject Pop-up:
- Clicking the Reject button displays a pop-up for adding comments regarding the rejection.
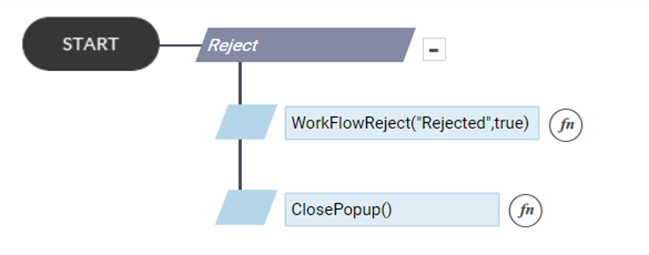
- Reject Action Rule:
- Rule Name: WorkFlowReject(Comments,Alert User)
- Parameter 1: Comments (Optional) – Add comments regarding the rejection.
- Parameter 2: Alert User (Optional) – Users receive email notifications about the rejection.
5. Recall
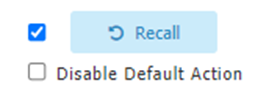
- Functionality:
- The Recall button allows users to recall a request to make changes. After recalling, the request moves from the Outbox to the Inbox, enabling further modifications and actions.
- Recall Restrictions:
- Recall is disabled for all users except the workflow initiator in a parallel workflow pattern.
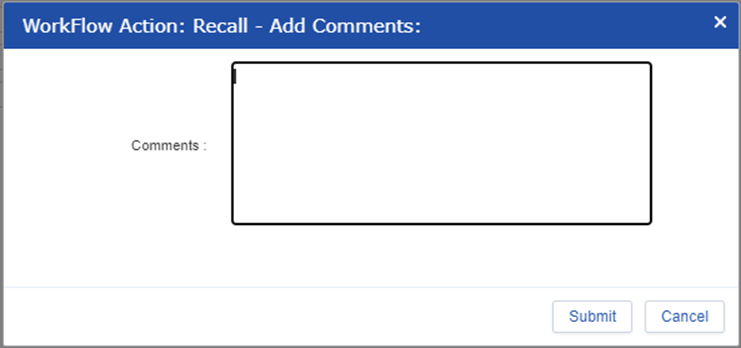
- Recall Pop-up:
- Clicking Recall opens a window where comments regarding the recall action can be added.
- Recall Action Rule:
- Rule Name: WorkFlowRecall
- Parameter 1: Comments (Optional) – Add comments regarding the recall.
- Parameter 2: Alert User (Optional) – Users receive email notifications about the recall.
6. Reverse
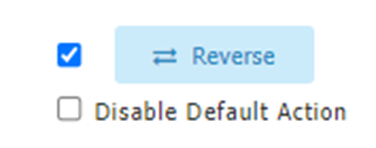
- Functionality:
- The Reverse button allows users to revert a request to any previous step determined by the user.
- Restrictions:
- Reverse is disabled in parallel workflow patterns.
- Reverse Process:
- When reversed, the flow returns to the specified step and follows the sequential flow from there to the next steps.
- Reverse Pop-up:
- Clicking Reverse opens a window where you specify the step to which the request should be reversed and add comments regarding the reverse action.
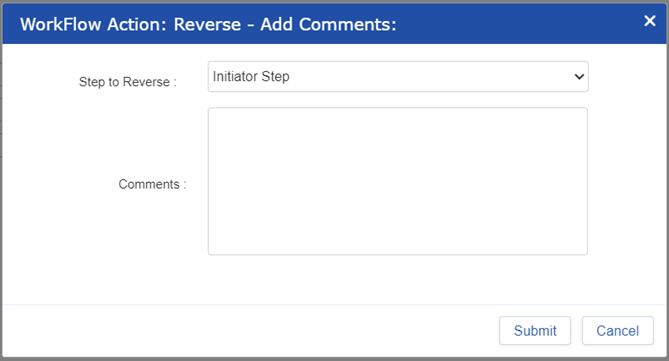
- Reverse Action Rule:
- Rule Name: WorkFlowReverse(StepNumber,Comments,Alert User)
- Parameter 1: StepNumber (Required) – Number of the step to which the reversing should redirect.
- Parameter 2: Comments (Optional) – Add comments regarding the reverse operation.
- Parameter 3: Alert User (Optional) – Users receive email notifications about the reverse operation.
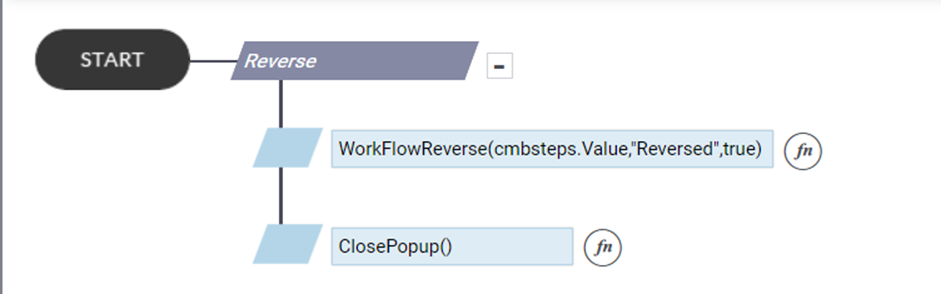
In this example, the workflow is reversed to the step specified by cmbsteps.Value, with the comments “Reverse,” and the user will be notified via email.
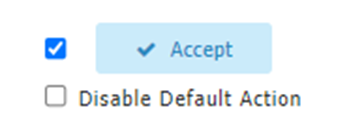
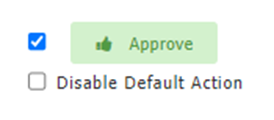
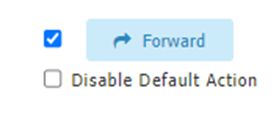
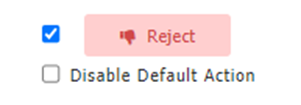
7. Disable Default Action
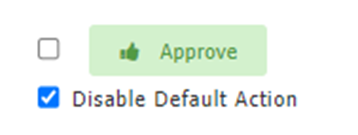
- Functionality:
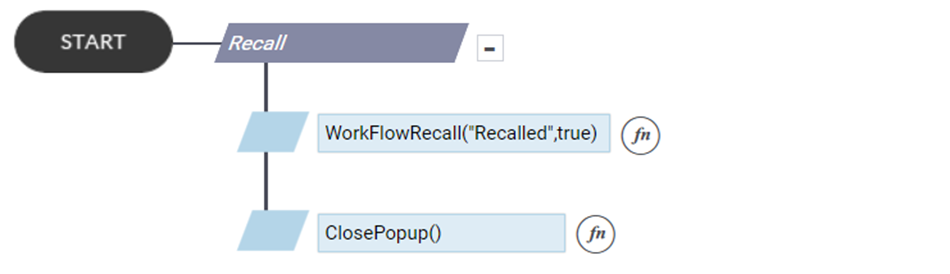
- The Disable Default Action option is available for every step except the initiator step. When this option is checked, the default action pop-up is skipped, and the flow proceeds based on custom rules defined in the “Rules” tab.
- Behavior:
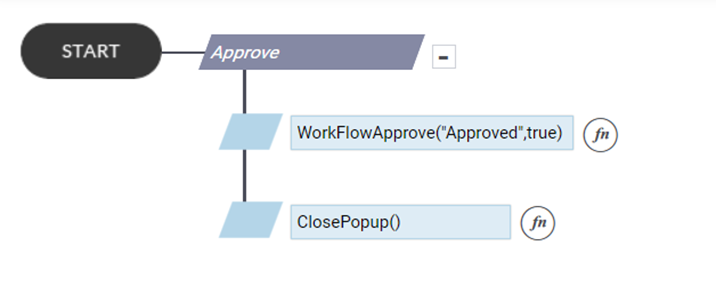
- If Disable Default Action is enabled, the flow will follow rules with the “WorkflowAction” trigger, allowing custom rules to be executed before performing the clicked action. The current action can be identified using the WorkFlow.ClickedAction property.
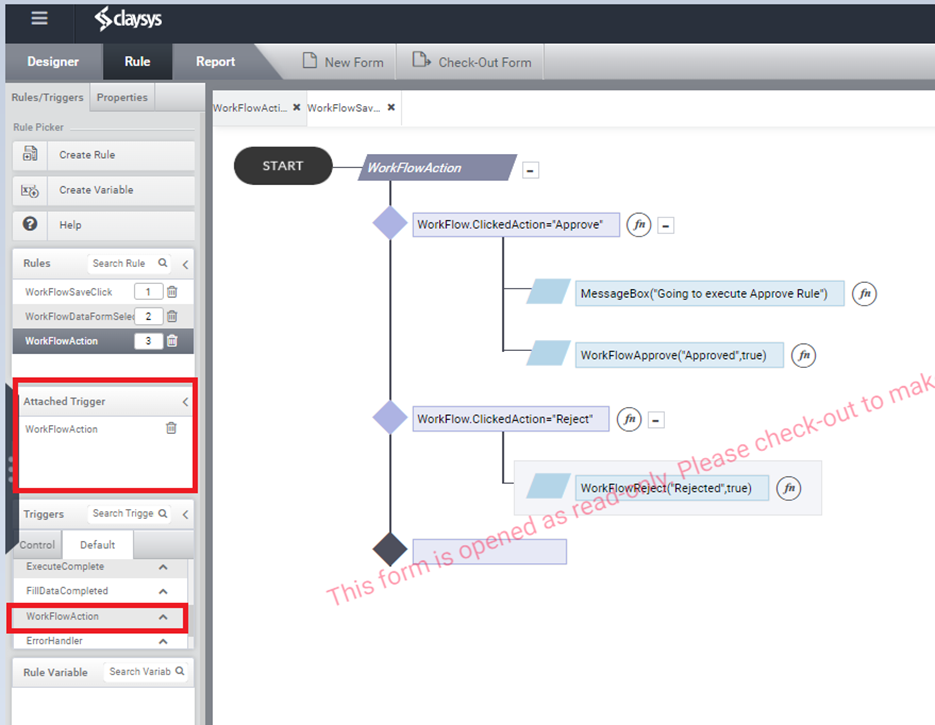
- Example:
- If Approve is clicked and Disable Default Action is enabled, the rule with the “WorkflowAction” trigger will be executed, bypassing the default pop-up. The workflow-related functions will be managed by the custom rules.
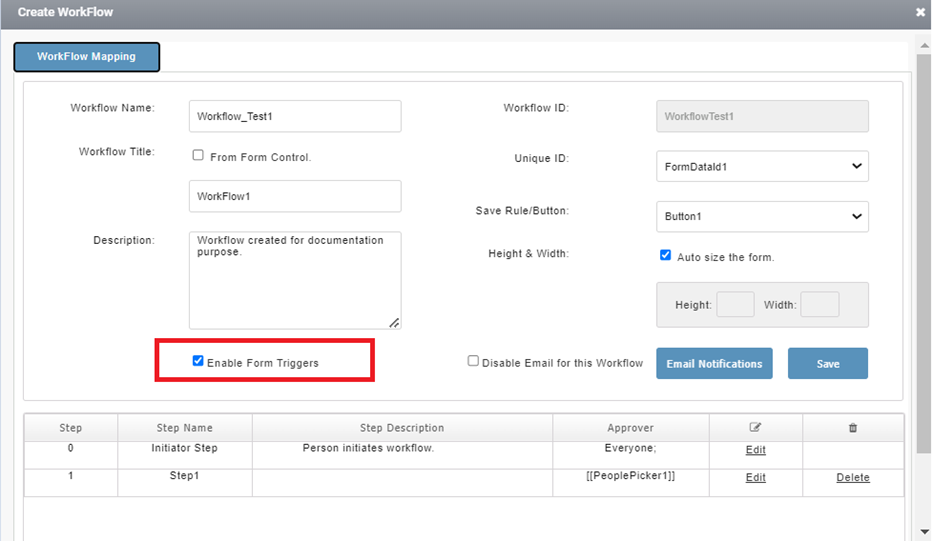
Enable Form Triggers is an option to activate these custom rules directly from the form.
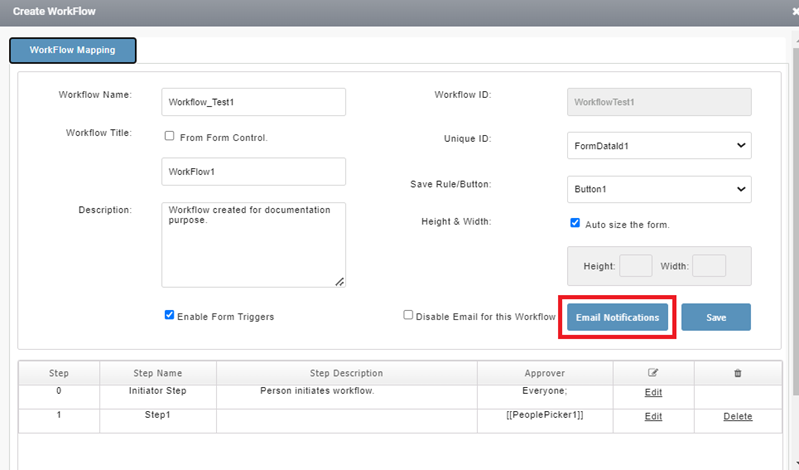
Email Notification Configuration
- Accessing Email Notification Configuration:
- In the Workflow Mapping window, after adding the Initiator Step, the Email Notification button will appear. Click this button to open the Email Notification configuration window.
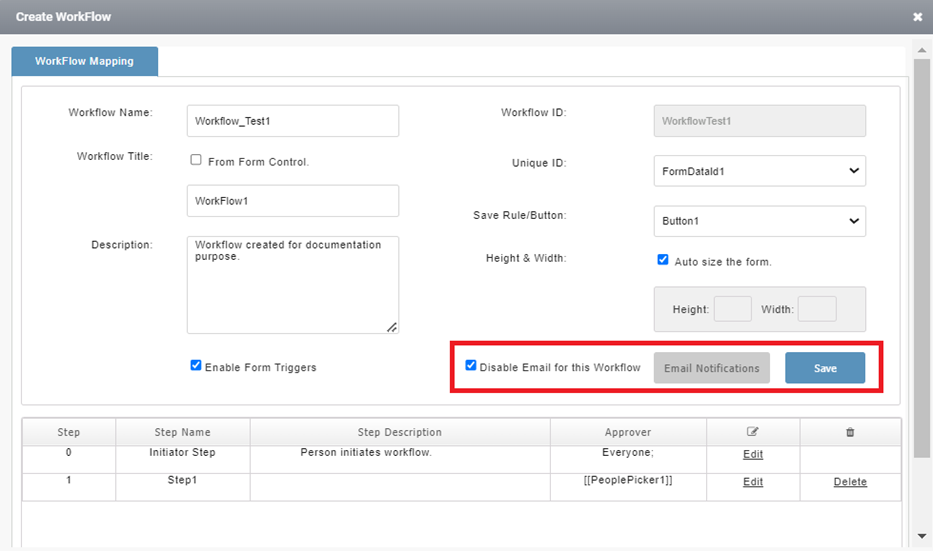
- Disable Email for this Workflow:
- Purpose: To disable email notifications for the entire workflow.
- How to Disable: Check the “Disable Email for this workflow” checkbox and click the Save button.
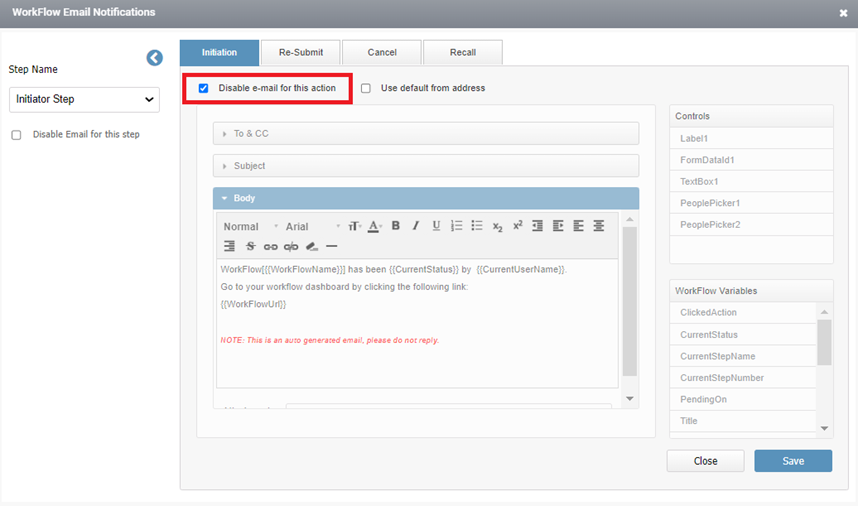
- Workflow Email Notification Window Components:
- Disable Email for this Step:
- Selection: Choose the required step from the drop-down menu in the left pane.
- Purpose: Disable email notifications for the selected step.
- Disable Email for this Step:
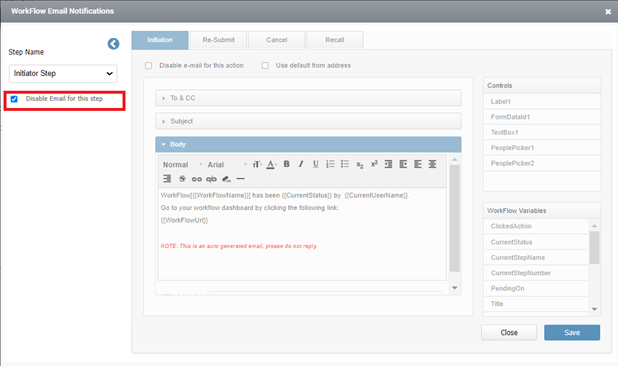
- Disable Email for this Action:
- Purpose: Disable email notifications for the current action being configured.
- Controls:
- Location: Available in the ‘Controls’ tab on the right pane.
- Purpose: Select controls from the form that can be included in the email configuration.
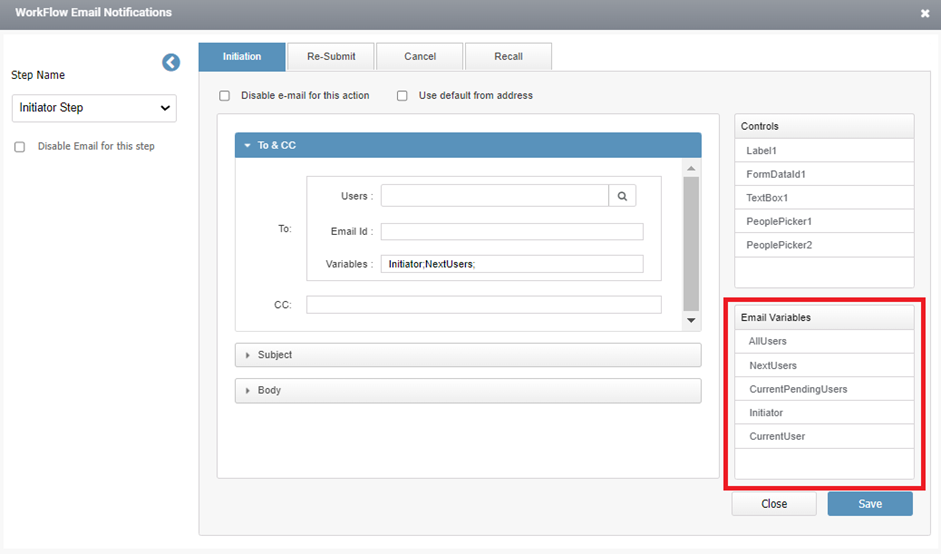
- Email Variables:
- Location: Found in the ‘Email Variables’ tab.
- Purpose: Pre-defined variables that can be added to the email content. Examples include
Initiator,NextUser.
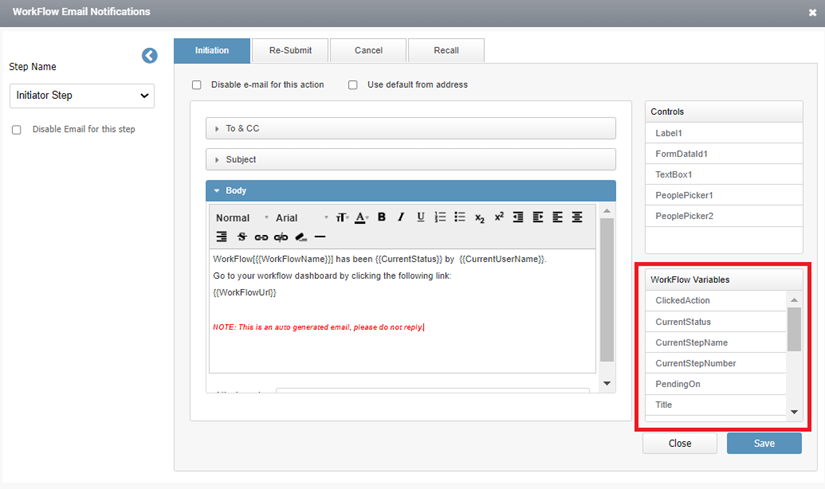
- Workflow Variables:
- Location: Found in the ‘Workflow Variables’ tab.
- Purpose: Pre-defined workflow-specific variables that can be used in the subject and body of the email. Examples include
CurrentStatus,CurrentUsername.
Fields Available for Email Configuration
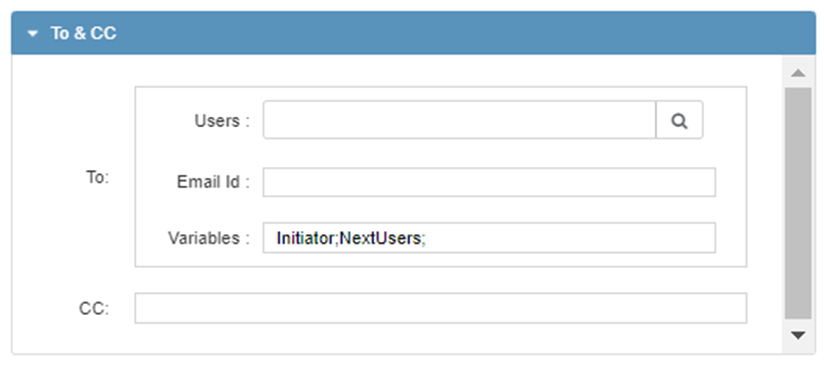
- To & CC:
- User: Select the recipient user for the email.
- EmailID: Specify the email ID here. Form controls can also be used if email IDs are generated dynamically.
- Variables: Add email variables to this field.
- CC: Enter email IDs for CC recipients.
- Subject:
- Purpose: Enter the subject line of the email. You can add controls and workflow variables.

- Body:
- Purpose: Enter the body content of the email. Controls and workflow variables can be included.
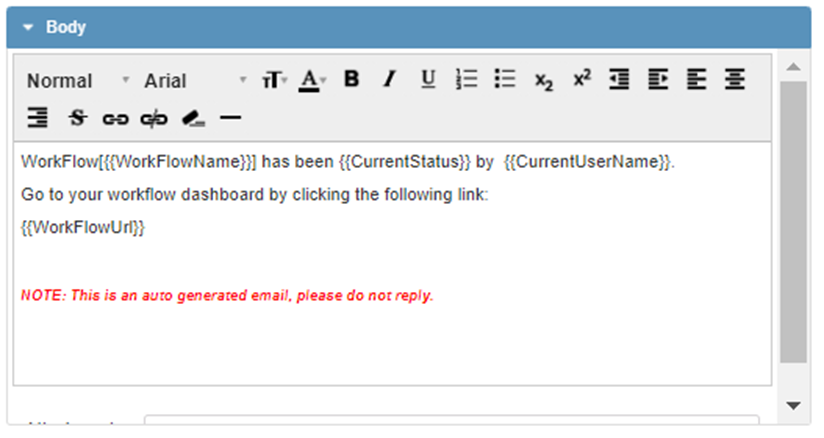
Note: These fields apply to email configuration for all actions.
Step-Wise Email Configuration
- Initiator Step:
- Tabs Available: Initiation and Recall.
- Initiation Tab: Configure the email sent when initiating a request.
- Recall Tab: Configure the email sent when recalling a request.
- Tabs Available: Initiation and Recall.
- Approver Step:
- Sequential Workflow:
- General Tab: Configure common emails for all approver actions such as Accept and Approve by checking the “Use this for all actions” checkbox.
- Accept Tab: Configure the email sent when a request is accepted.
- Approve Tab: Configure the email sent when a request is approved.
- Reject Tab: Configure the email sent when a request is rejected.
- Forward Tab: Configure the email sent when a request is forwarded.
- Recall Tab: Configure the email sent when a request is recalled.
- Reverse Tab: Configure the email sent when a request is reversed.
- Parallel Workflow:
- Tabs Not Available: Accept, Recall, and Reverse tabs are not available as these actions do not exist in parallel workflows.
- Configuration: Follow the configurations as mentioned above for the available actions.
- Sequential Workflow:
Workflow Dashboard Settings
Workflow Dashboard Settings allow users to configure and customize the appearance and functionality of the workflow dashboard for their tenant. This feature lets users map or associate a specific form with the workflow dashboard, displaying relevant information or data directly on the dashboard interface.
Steps to Map a Form on the Workflow Dashboard Page
- Access Tenant Settings:
- Action: Click on Tenant Settings from the Links tab.
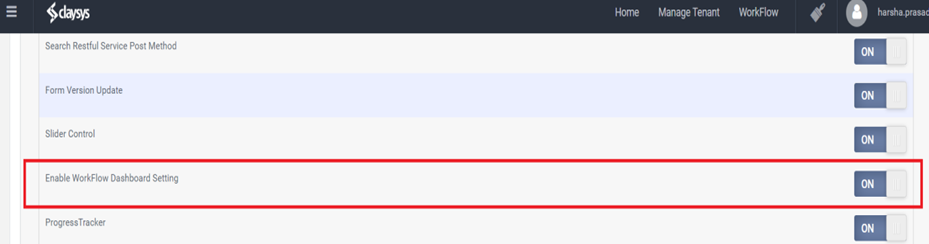
- Enable Workflow Dashboard Setting:
- Action: Activate the Workflow Dashboard setting from the Beta Version section.
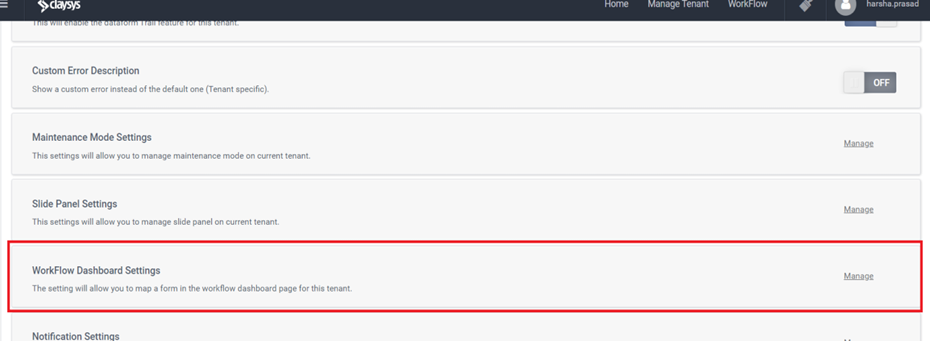
- Navigate to Basic Settings:
- Action: Go to the basic settings within Tenant Settings and locate the option to manage workflow dashboard settings.
- Description: This setting allows you to map a form on the workflow dashboard page for your tenant.
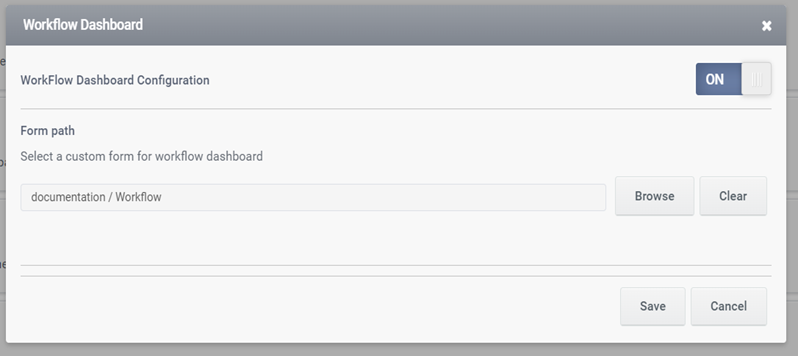
- Configure the Workflow Dashboard:
- Action Steps:
- Click the Manage link to open the Workflow Dashboard popup.
- Enable the workflow dashboard configuration within the popup.
- Click the Browse button to select a custom form for the workflow dashboard.
- After selecting the form, click Save to apply the changes.
- Action Steps:
- Navigate to the Workflow Dashboard:
- Action: Go to the workflow dashboard to see the applied configuration.
Mapped Custom Form Details
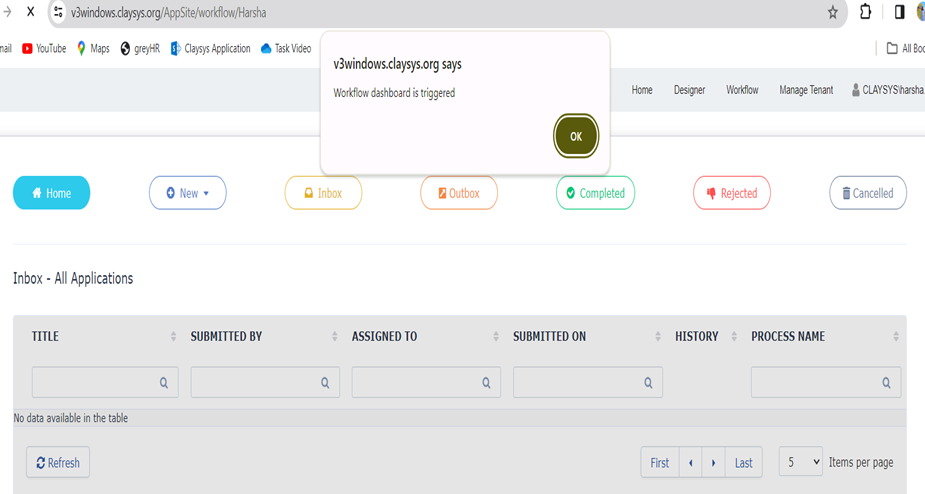
- Form Load Trigger:
- Example Rule: A rule is added in the form load trigger, such as
MessageBox("Workflow dashboard is triggered").
- Example Rule: A rule is added in the form load trigger, such as
- Form Loading Behavior:
- The mapped custom form will load before the workflow dashboard. The message box or any configured elements within the custom form will be displayed as soon as the dashboard is turned on.
Workflow – Exposed Properties
The following properties are available for use in the rules area:
WorkFlow.ApproverControlName- Description: Returns the control name that holds the approver’s control name of the current step, only if the approver is from a Form Control.
WorkFlow.ClickedAction- Description: Returns the action that was clicked if “Disable Default Action” is checked in the step configuration.
WorkFlow.CurrentStatus- Description: Returns the current status of the workflow.
WorkFlow.CurrentStepCode- Description: Returns the StepCode of the current step.
WorkFlow.CurrentStepName- Description: Returns the Step Name of the current step.
WorkFlow.CurrentStepNumber- Description: Returns the Step Number of the current step.
WorkFlow.ID- Description: Returns the ID of the Workflow.
WorkFlow.IsApproverFromControl- Description: Returns
trueif the approver of the current step is from a Form Control.
- Description: Returns
WorkFlow.IsFormEditable- Description: Returns
trueif “Allow Approver to Edit the form” or “Allow Initiator to Edit the Form” is checked.
- Description: Returns
WorkFlow.IsParallel- Description: Returns
trueif the current step is configured for parallel processing.
- Description: Returns
WorkFlow.IsReturnForApproval- Description: Returns
trueif the forwarded person checked “Return for Approval”.
- Description: Returns
WorkFlow.IsTitleFromControl- Description: Returns
trueif the “Title from Control” is checked in the Workflow mapping page.
- Description: Returns
WorkFlow.IsWorkFlow- Description: Returns
trueif the current form execution is part of a Workflow.
- Description: Returns
WorkFlow.PendingOn- Description: Returns the name of the person on whom the Workflow is currently pending.
WorkFlow.SaveButton- Description: Returns the name of the save button for the current Workflow.
WorkFlow.Title- Description: Returns the title of the current Workflow.
WorkFlow.TotalStepCount- Description: Returns the total count of steps in the current Workflow.
WorkFlow.UniqueID- Description: Returns the unique ID of the current Workflow.
WorkFlow.WorkFlowName- Description: Returns the name of the current Workflow.
Example of Sequential Workflow
Here’s an example of a sequential workflow with the described steps and approvers:
Initiator:
- Harsha.prasad
Workflow 1 (WF1):
Step 1:
- Approver: ADsynctest2
- Actions Available: Accept, Reject
Details: ADsynctest2 must either accept or reject the request. If rejected, the workflow is terminated.
Workflow 2 (WF2):
Step 1:
- Approvers: ADsynctest2
- Actions Available: Accept, Reverse to Initiator Step
Details: ADsynctest2 can accept the request or reverse it back to harsha.prasad (the initiator). If reversed, harsha.prasad can resubmit or cancel.
Step 2:
- Approver: harsha.prasad
- Actions Available: Resubmit, Cancel
Details: harsha.prasad can resubmit the workflow or cancel the workflow.
Step 3:
- Approvers: ADsynctest2
- Actions Available: Approve, Reject
Details: If resubmitted, ADsynctest2 again approves or rejects. while rejection terminates the workflow.
Workflow 3 (WF3):
Step 1:
- Approvers: ADsynctest2
- Actions Available: Accept, Approve
Details: ADsynctest2 must accept and approve the request. If accepted and approved, the workflow moves to the next step.
Step 2:
- Approvers: ADsynctest3
- Actions Available: Accept, Reverse to Step 1
Details: ADsynctest3 can accept the request or reverse it to step1, sending it back to ADsynctest2 for re-evaluation.
Step 3:
- Approvers: ADsynctest2
- Actions Available: Resubmit, Cancel
Details: If reversed, ADsynctest2 can resubmit or cancel the request. Resubmission will return the workflow to Step 2 of WF3.
Step 4:
- Approvers: ADsynctest3
- Actions Available: Approve, Reject
Details: Finally, ADsynctest3 must approve or reject the request. Approval completes the workflow, while rejection ends it.
Example of Parallel Workflow
Parallel workflows handle multiple approvers simultaneously at each step, unlike sequential workflows where steps are processed one after another. When configuring a parallel workflow, the system offers the option to set up parallel rules via a “Configure” button that appears next to the parallel checkbox.
Parallel Step Configuration
This configuration popup allows you to set up conditions for advancing to the next step in the workflow. The rules can be categorized into:
- Count or Weightage Based
- Priority Based
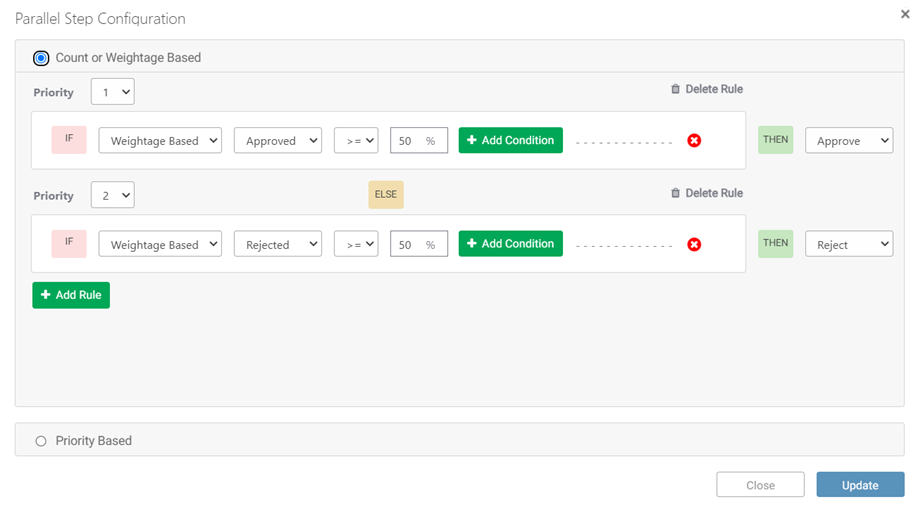
1. Count or Weightage Based Rules
- Count Based Rule: Use this rule when the number of approvers is known. The workflow progresses based on the count of approvals or rejections.
- Weightage Based Rule: Use this rule when the number of approvers is not fixed. Define weightage for approvals and rejections. The workflow proceeds based on the cumulative weightage achieved.
2. Priority Based Rules
- Configuration: For priority-based rules, you must list user names in the step configuration. Priority can only be assigned to individual users, not groups or form control values.
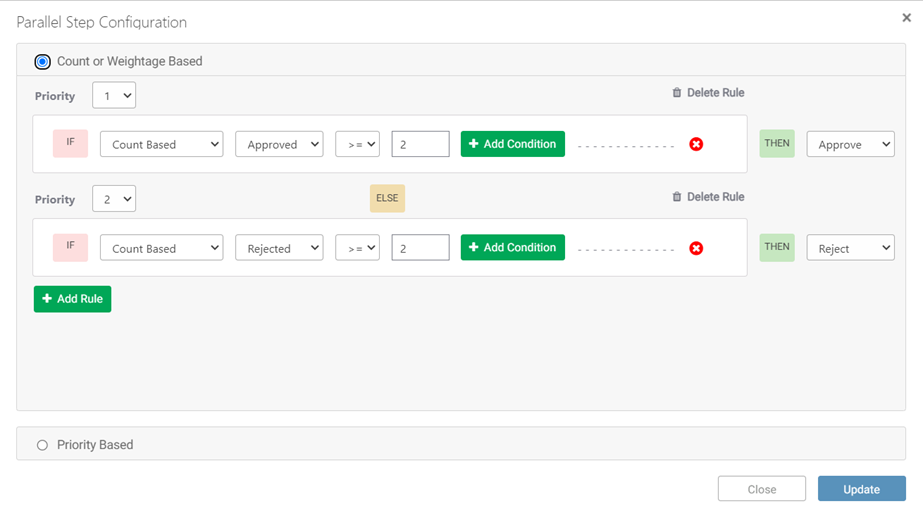
Count-Based Workflow Configuration
Initiator: Everyone
1st Approver: ADTest1, ADTest2
Step 1 Criteria:
- Approvals: ≥ 2 (Approve)
- Rejections: ≥ 2 (Reject)
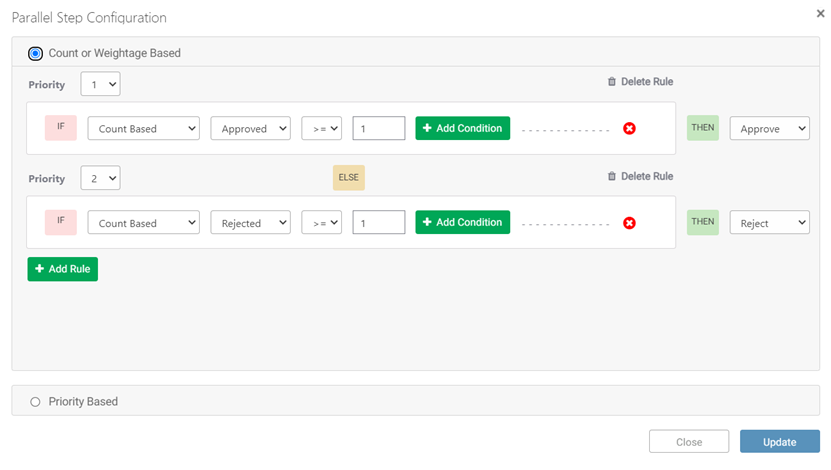
2nd Approver: ADTest3,ADTest4
Step 2 Criteria:
- Approvals: ≥ 1 (Approve)
- Rejections: ≥ 1 (Reject)
Workflow Execution Example:
- Initiation:
- The workflow is initiated and sent to 1st Approvers: ADTest1 and ADTest2.
- Step 1 Execution:
- ADTest1 and ADTest2 receive the workflow for approval.
- Scenario A: All Approvals
- ADTest1 approves.
- ADTest2 approves.
- Result: With 2 approvals, the criteria (≥ 2 approvals) are met. The workflow progresses to Step 2 with ADTest3 and ADTest4.
- Scenario B: Mixed Approvals and Rejections
- ADTest1 approves.
- ADTest2 rejects.
- Result: Since the criteria for approvals and rejections are not fully met, the workflow remains in Step 1 until the criteria are satisfied.
- Scenario C: All Rejections
- ADTest1 rejects.
- ADTest2 rejects.
- Result: Since the criteria (≥ 2 rejections) are met, the workflow is rejected and does not proceed to Step 2.
- Step 2 Execution (if Step 1 Criteria Met):
- Assuming the workflow passed Step 1, it now progresses to 2nd Approvers: ADTest3 and ADTest4.
- Scenario A: Sufficient Approvals in Step 2
- ADTest3 approves.
- ADTest4 rejects.
- Result: With ≥ 1 approval in Step 2, the workflow is considered approved. The workflow is completed or moves to the next predefined step.
- Scenario B: Insufficient Approvals
- ADTest3 rejects.
- ADTest4 rejects.
- Result: Since the criteria for approvals are not met, and if the rejection criteria are also not met, the workflow may either stay in Step 2 for further actions or get rejected based on additional rules.
- Final Outcome:
- If Step 1 and Step 2 criteria are met as specified, the workflow successfully progresses to completion.
- If the criteria are not met, the workflow may need further actions or revisions based on the defined rules.
Priority-Based Workflow Configuration
In a priority-based workflow, approvers are assigned different levels of priority. The workflow progresses based on the priority conditions met at each step.
Configuration Details:
Initiator: Everyone
Approvers: ADTest1, ADTest2
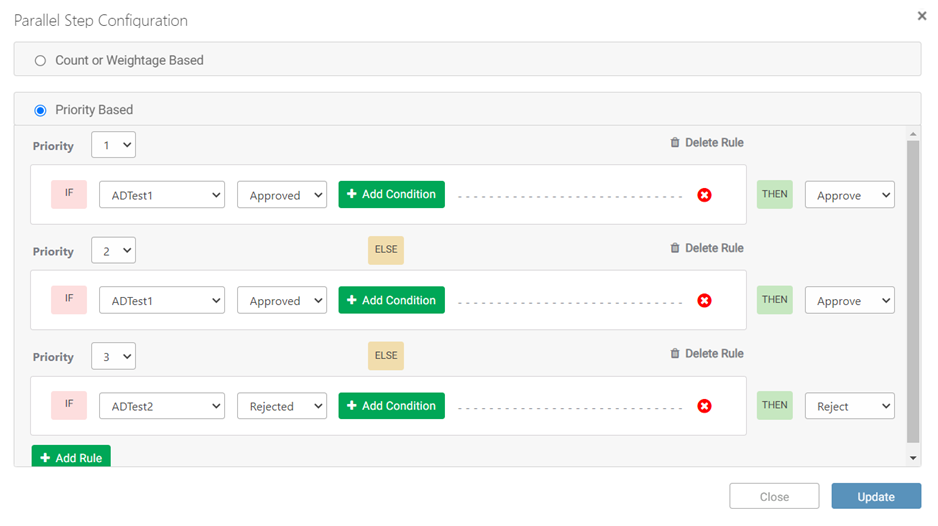
Workflow Execution:
- Initiation: Workflow is initiated with all approvers listed.
- Step Evaluation:
- Priority 1: Check if ADTest1 approves. If true, approve the workflow.
- Priority 2: If ADTest1 did not approve, evaluate this condition. If ADTest1 approves, approve the workflow.
- Priority 3: If ADTest2 rejects (and previous conditions are not met), the workflow will be rejected.
Weightage-Based Parallel Workflow Execution Example
Workflow Configuration:
- Initiator: Everyone
- Approvers: ADTest1, ADTest2, ADTest3
- Criteria:
- Approval Threshold: 50% or more of the approvers must approve for the workflow to be approved.
- Rejection Threshold: 50% or more of the approvers must reject for the workflow to be rejected.
Workflow Execution Example:
- Initiation:
- The workflow is initiated and assigned to ADTest1, ADTest2, and ADTest3.
- Step 1 Execution:
- ADTest1, ADTest2, and ADTest3 receive the workflow for approval.
- Scenario A: Sufficient Approvals
- ADTest1 approves.
- ADTest2 approves.
- ADTest3 does not respond or is absent.
- Result: With 2 out of 3 approvers (66.7%) approving, which is ≥ 50%, the workflow is approved and proceeds to the next step or completion.
- Scenario B: Mixed Approvals and Rejections
- ADTest1 approves.
- ADTest2 rejects.
- ADTest3 approves.
- Result: With 2 approvals and 1 rejection, the approval weightage is 66.7%, which is ≥ 50%. The workflow is approved.
- Scenario C: Sufficient Rejections
- ADTest1 rejects.
- ADTest2 rejects.
- ADTest3 does not respond or is absent.
- Result: With 2 out of 3 approvers (66.7%) rejecting, which is ≥ 50%, the workflow is rejected and will not proceed further.
- Final Outcome:
- Approval Outcome: If the number of approvals is ≥ 50% of the total approvers, the workflow is approved and moves to the next step or completion.
- Rejection Outcome: If the number of rejections is ≥ 50% of the total approvers, the workflow is rejected and does not proceed further.