Data Table
The Data Table Control is a hidden feature used for displaying data in a table format. It functions similarly to the Table View Control but differs in that it loads data in the background during rendering. The key advantage of the Data Table Control is that it reduces loading time, as it does not render the data.
WORKING
User can drag and drop the Data Table Control in the form from Toolbars Hidden Data section.
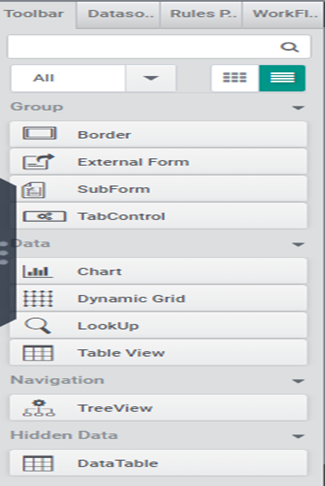
Data Table will not be visible in the form after drag and drop as it is a hidden control. We can see the data table controls in hidden controls section.

Just click on the Hidden controls button and it will list out all the hidden controls, which is used in the form.

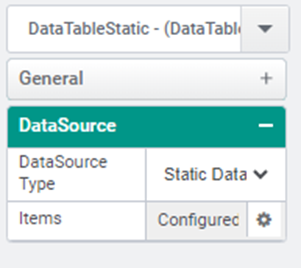
When the Data Table Control is clicked, the control details are displayed on the right side of the form. Additionally, configuration can be done by selecting the appropriate data sources.
The Data table can be viewed in two ways(By rule):
- ShowDataTable
- BindToTableView
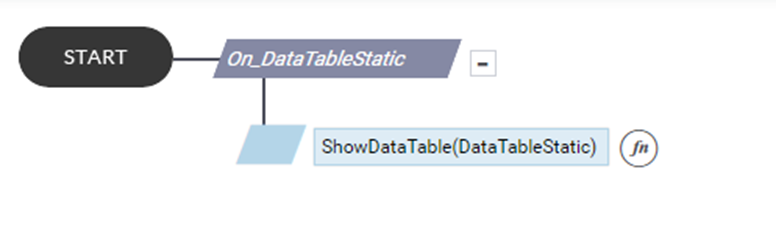
ShowDataTable
The ShowDataTable function is used to display a DataTable.
Example:
ShowDataTable(“DataTableStatic”)
In this example, the Data Table will be displayed which have name DataTableStatic.
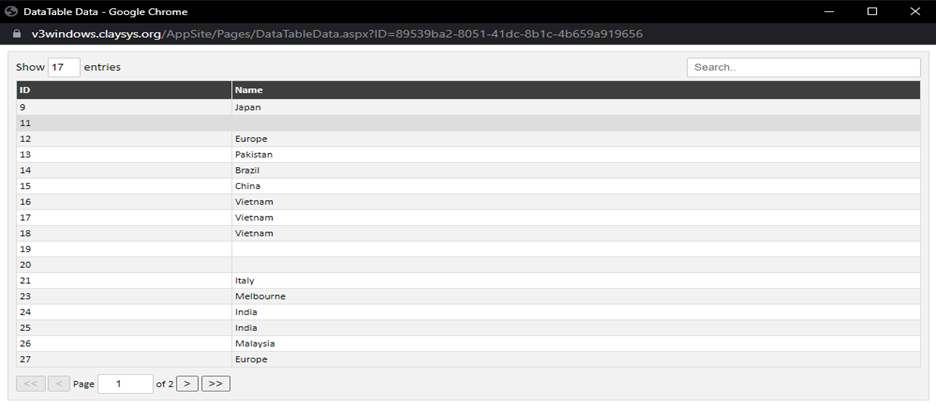
While giving ShowDataTable rule and by setting the trigger, a pop up will appear with the required data.
Preview of a Data Table:
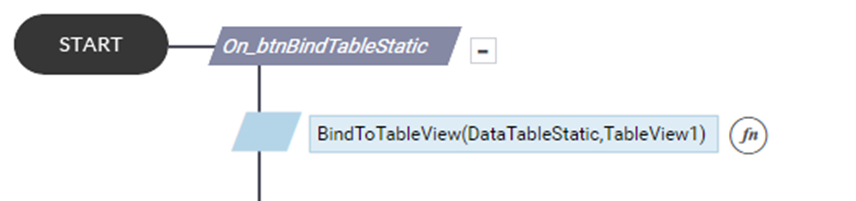
BindToTableView
BindToTableView is used to view the data of data table in a table view control. For that a table view control should be there in the form.
Example:
BindToTableView(“DataTableStatic”, “TableView1”)
In this example, data from the control named DataTableStatic will be bound to and displayed in the control named TableView1.
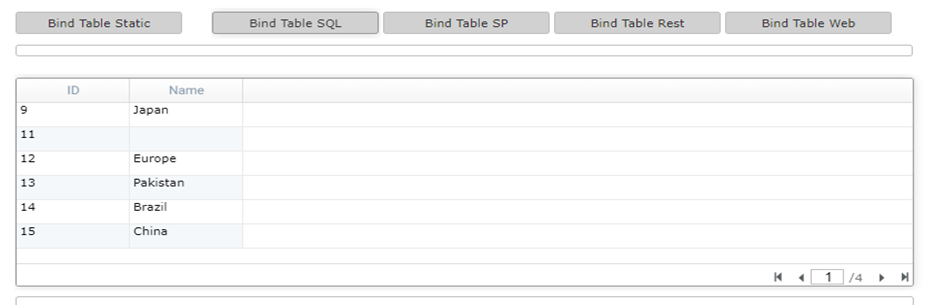
Preview:
CONFIGURATION
Data Table Control Configuration can be done in four ways:
- Static Data
- MS SQL
- Stored Procedure(SP)
- Web Service
- RESTful Service
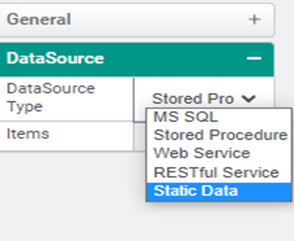
1. STATIC DATA
In Static Data, the data can be given statically.
Step 1: Select the Data Source Type as Static Data.
Step 2: Add the columns, which have to be inserted.
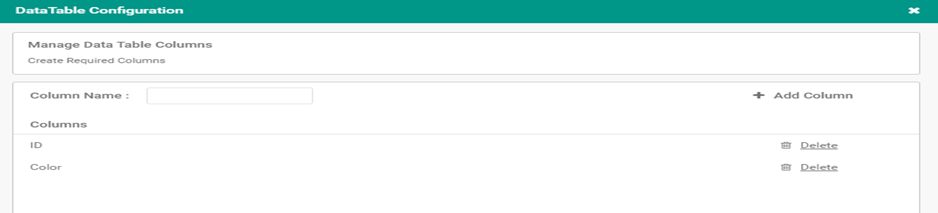
Give the column name and click on Add Column.
Step 3: Please enter the required data in the following window.
Click on Add Row, to add the values.
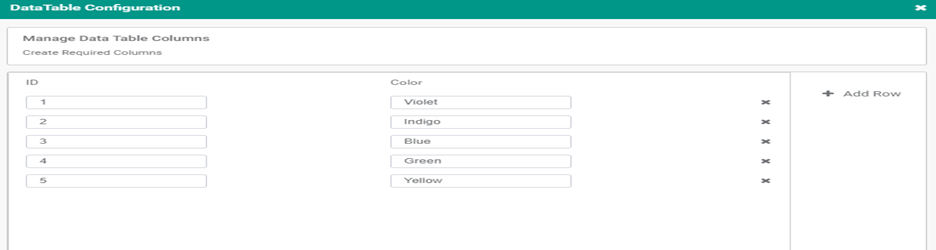
Step 4: Click Finish.
2. MS SQL
In MS SQL, the data can be taken from the table in the SQL database.
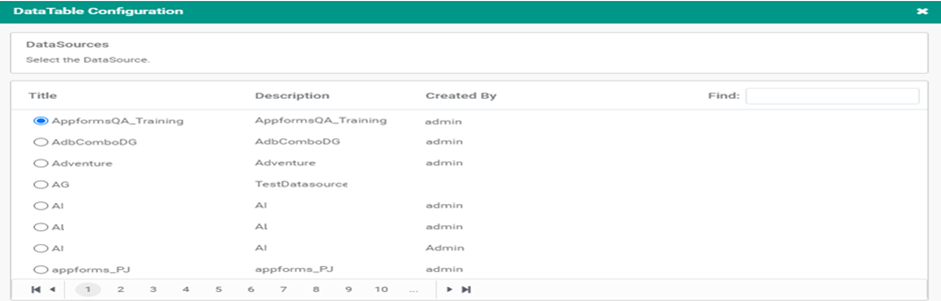
Step 1: Select the Data Source type as MS SQL.
Step 2: Select the data source.
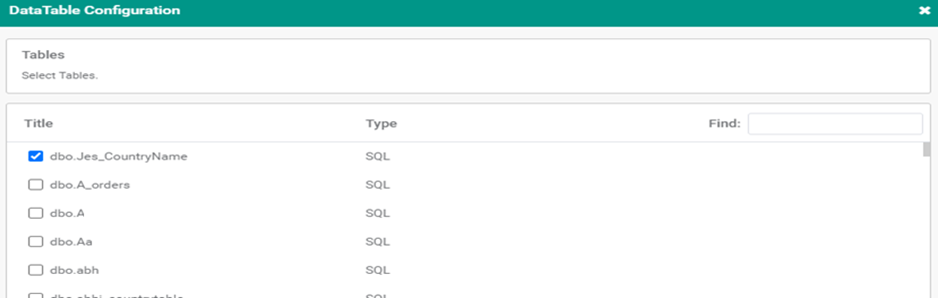
Step 3: Select the table from where the data has to be taken from the data source.
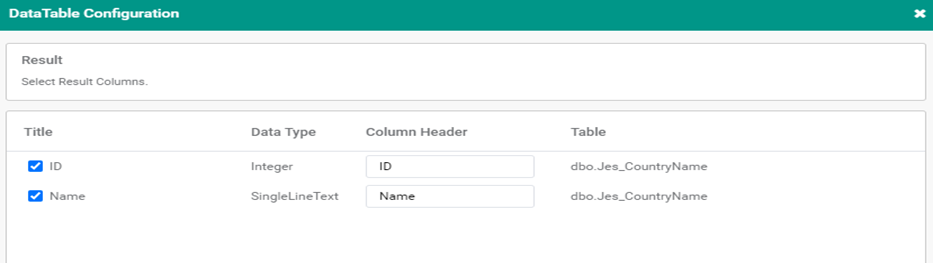
Step 4: Select the Columns from the table that has to be shown in the data table.
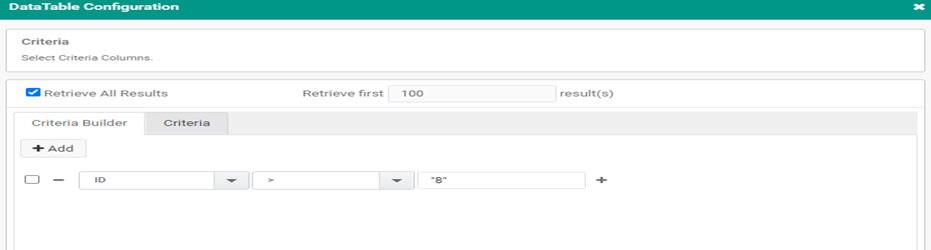
Step 5: Give the criteria, if there is any.
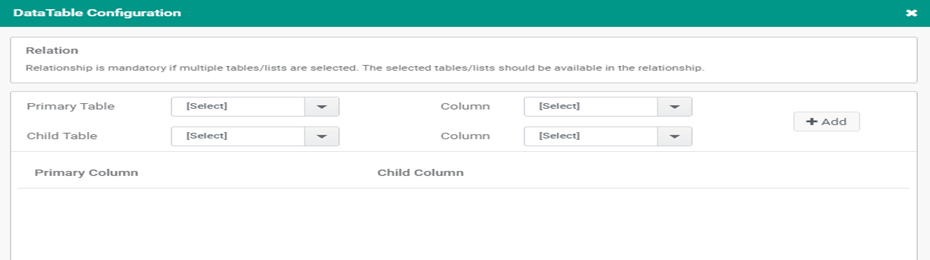
Step 6: If multiple tables are selected, the relationship is mandatory. So, select the primary and child tables from the selected tables. The selected tables should be available in the relationship.
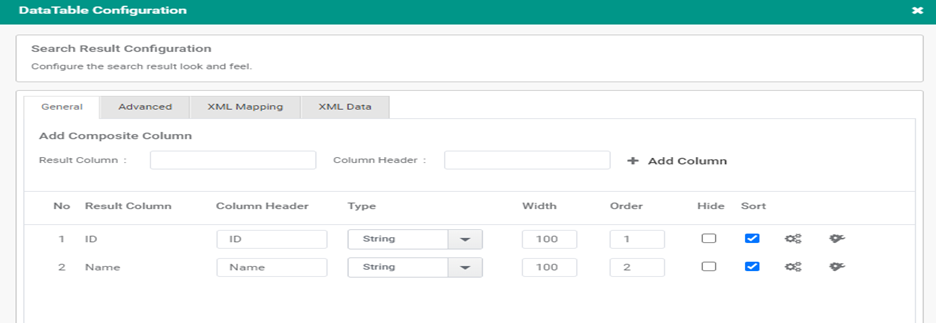
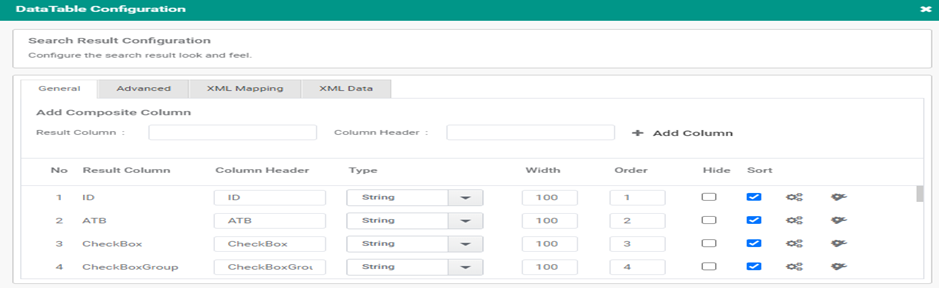
Step 7: Configure the search result look.
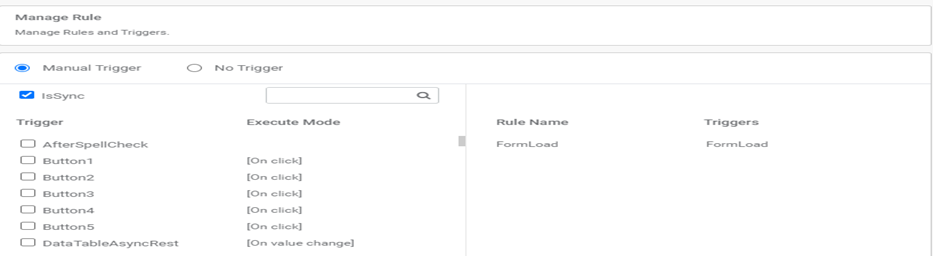
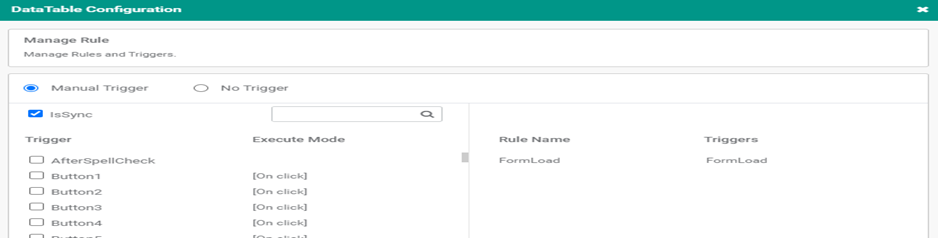
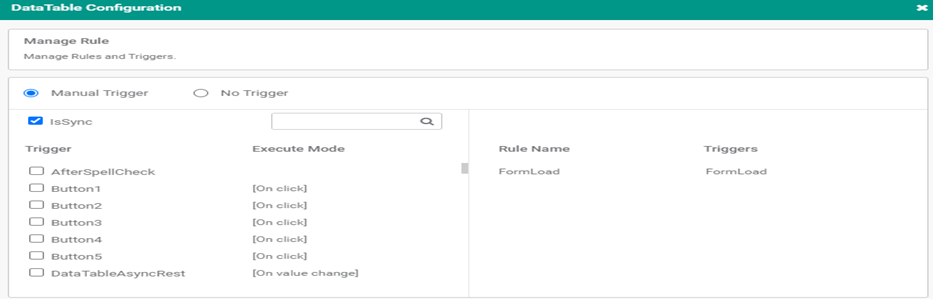
Step 8: Set the trigger.
Step 9: Click on Finish.
3. STORED PROCEDURE
Step 1: Select the Data Source type as Stored Procedure.
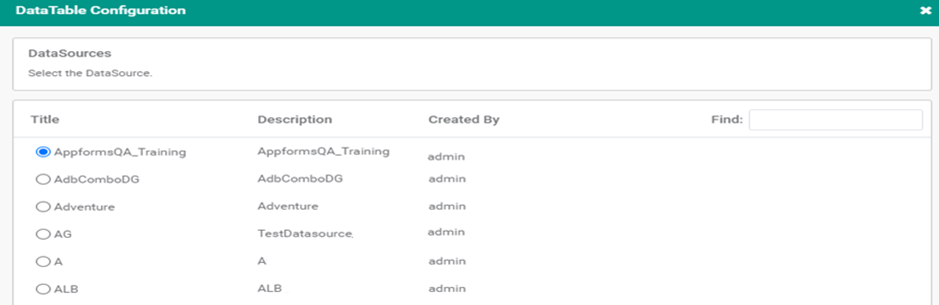
Step 2: Select the data source.
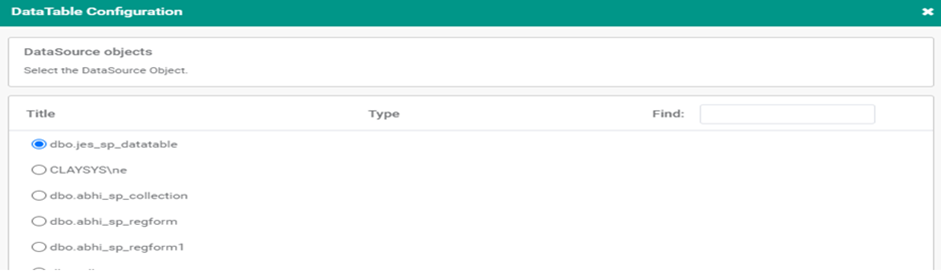
Step 3: Select the data source object, where the stored procedure is written.
Step 4: Map stored procedure results to columns.

Step 5: Configure the search result look.
Step 6: Set the trigger
Step 7: Click on Finish
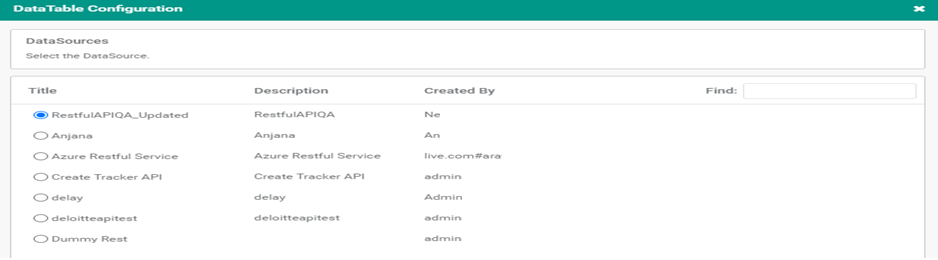
4. RESTful
Step 1: Select the Data Source type as RESTful.
Step 2: Select the Data Source from the list.
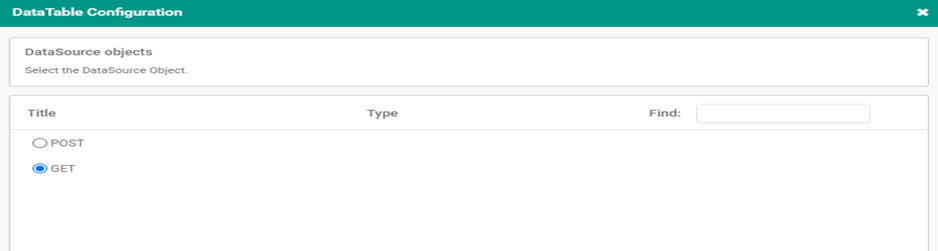
Step 3: Select the Data Source object as POST or GET.
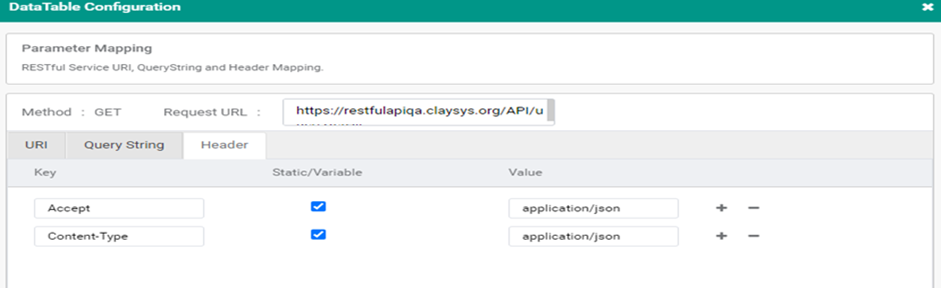
Step 4: Parameter mapping, provide the request URL, RESTful Service URI, Query String, and Header Mapping.
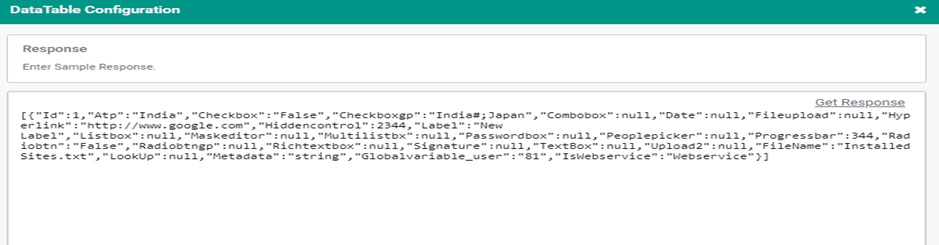
Step 5: Enter the Sample Response code.
Step 6: Select the column name which is needed.
Step 7: Configure the search result look.
Step 8: Set the trigger.
Step 9: Click on Finish.
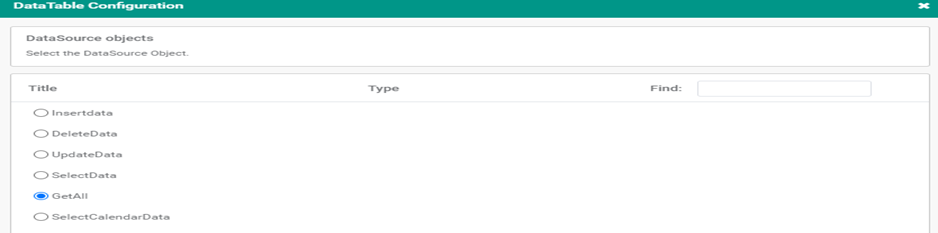
5. WEBSERVICE
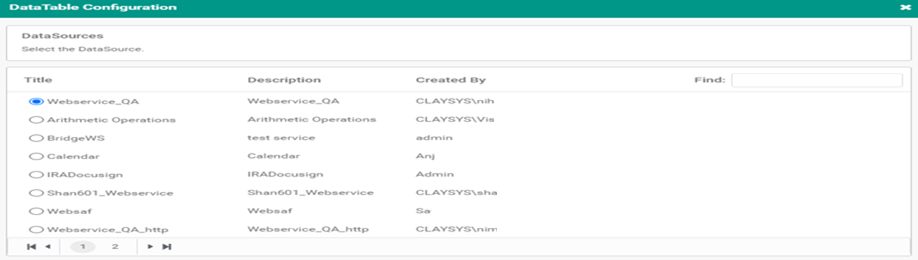
Step 1: Select the Data source.
Step 2: Select the Data source object.
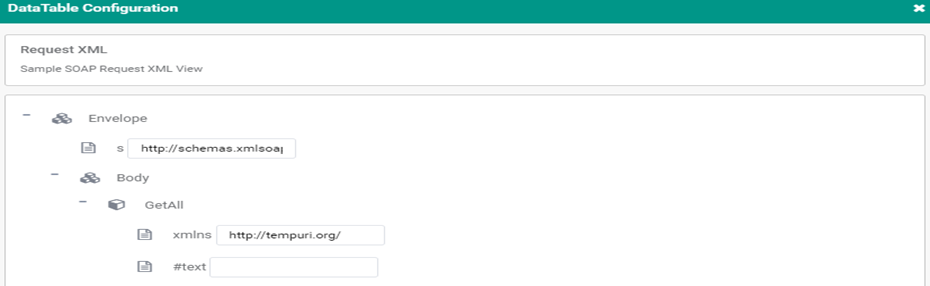
Step 3: Sample request XML View
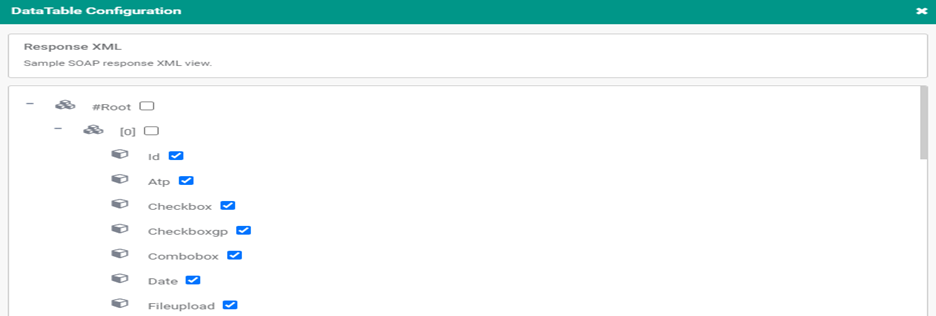
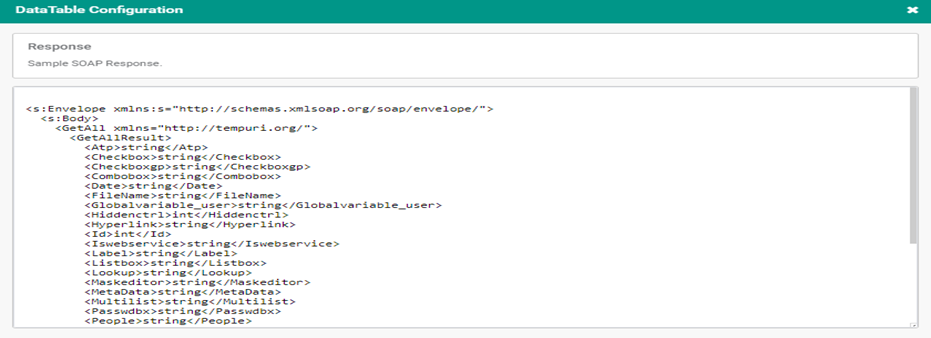
Step 4: Sample Response.
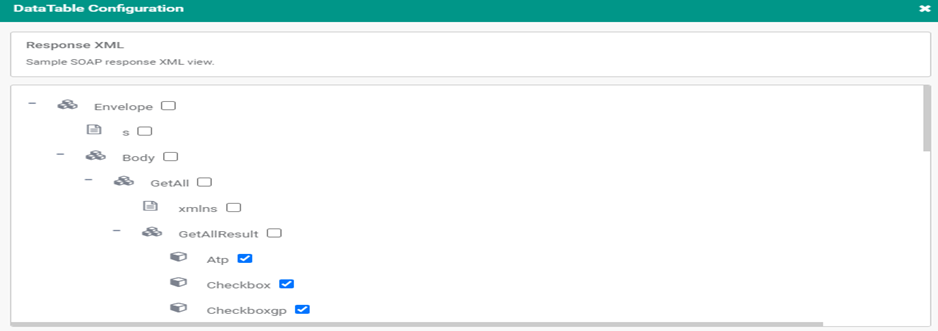
Step 5: Select the column name which is needed.
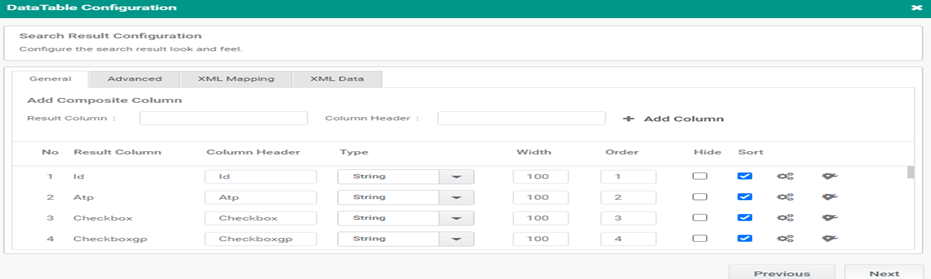
Step 6: Configure the search result look.

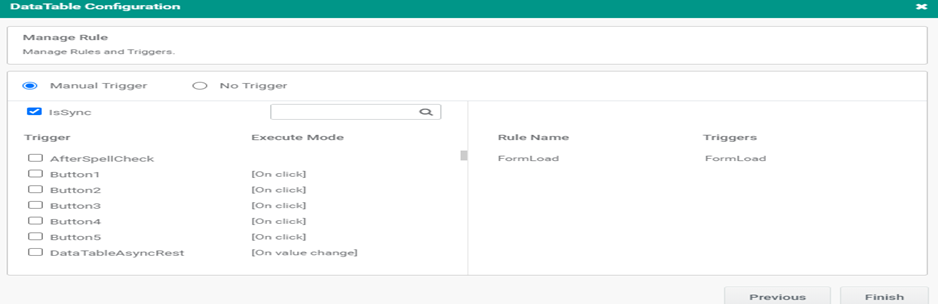
Step 7: Set the trigger.
Step 8: Click on Finish.